 |
The prompt
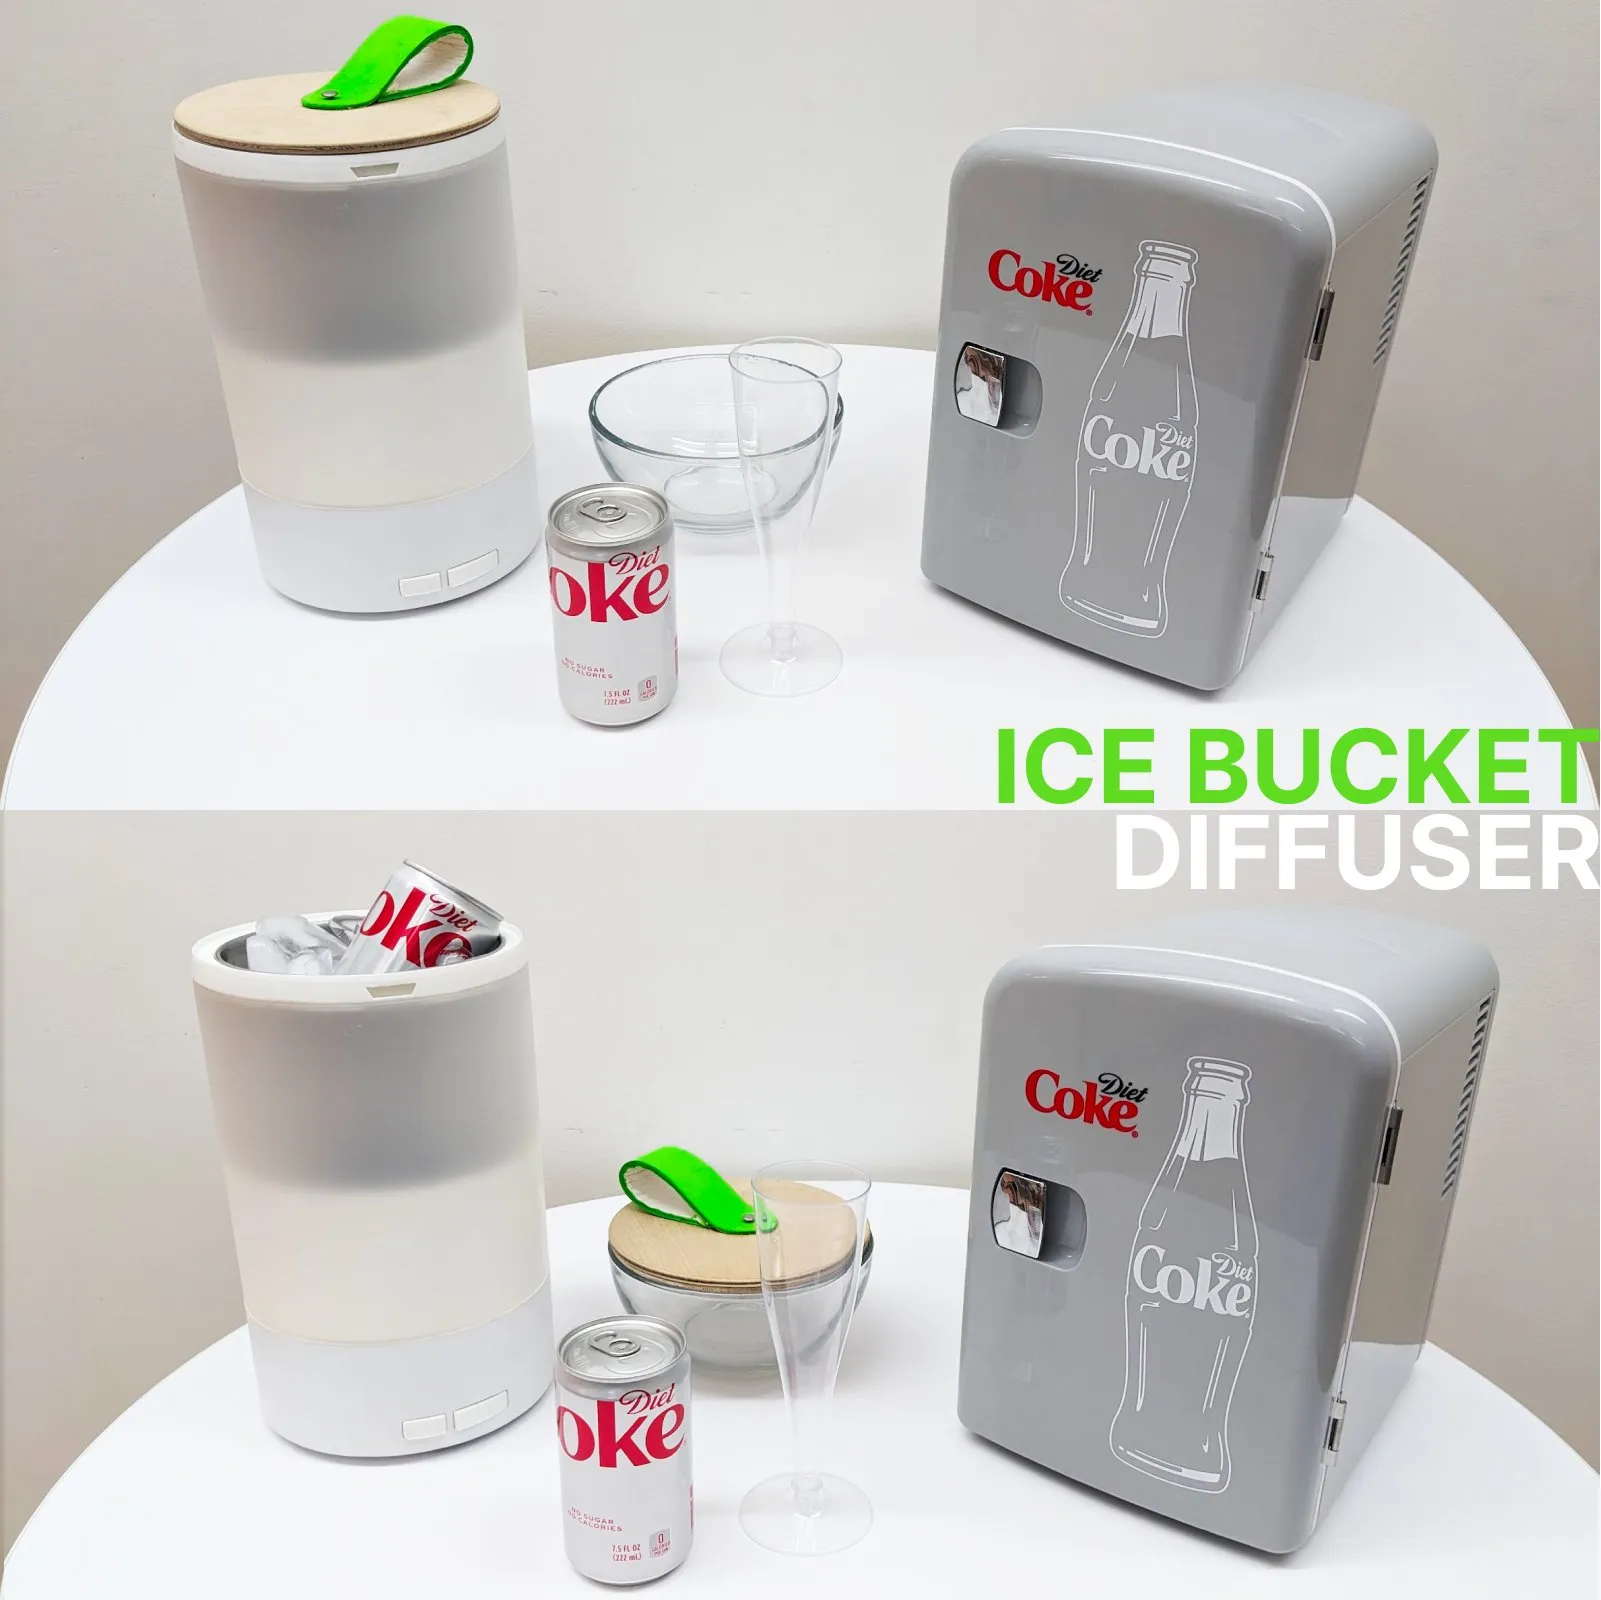
A product for a hotel that is inspired by the absurdity of Kenji Kawakami's chindōgu and the craftsmanship and aesthetic of Kenya Hara (creator of MUJI).
If you need a refresher on what a chindōgu is, I went deep on it during my Floordozer project for this same class: an "unusual tool" that solves an every day problem most can relate to but often creates more problems while doing so.
As for the aesthetic, MUJI started in 1980, and their full name, Mujirushi Ryōhin, means something like "no-brand quality goods". Kenya Hara has been their art director since 2001. He describes the whole philosophy as emptiness: objects that don't shout at you, that stay quiet enough for you to project whatever you want onto them.
Brainstorming
Vera and I went through a lot of ideas including:
- A cargo bathrobe that holds all the things a hotel gives you: door key, toiletries, pillow chocolates, coffee pods, etc.
- A bellboy uniform that has all the hotels keys hanging from it, individually in a grid that resembles the location of the rooms.
- A series of sleds for luggage that a bellboy "drives" like a sleddog
- Ice bucket molds that conform perfectly to the shape of a bottle of champagne.
- A room safe that stores your money but takes a fee when it returns it
We presented our ideas to the professor and he told us we're also thinking too small.
"Think more about interactivity"
"Think of the problems and form instead of objects"
"Don't do fabric"
OK. Back to square one!
The idea
When we think of hotels, one of the first things we think of are ice buckets.
Hotel ice buckets are such a strange object when you really think about them! There's an entire machine down the hall that exists just to fill this one thing. It usually comes with a little plastic liner, so the bucket never even touches the ice. And it's only doing its job for a few hours before it becomes... a bucket of warm water on your dresser.
The problem with ice buckets is after the ice has melted, you just dump it. But what if we recycled the water for a diffuser?
Well guess what? MUJI's most well known for their aromatic diffusers.
So, an ice bucket that turns last night's ice into this morning's room scent! It solves a problem nobody actually has and creates a few new ones along the way.
Perfectly unuseless.
Research and materials
Taking apart a MUJI diffuser
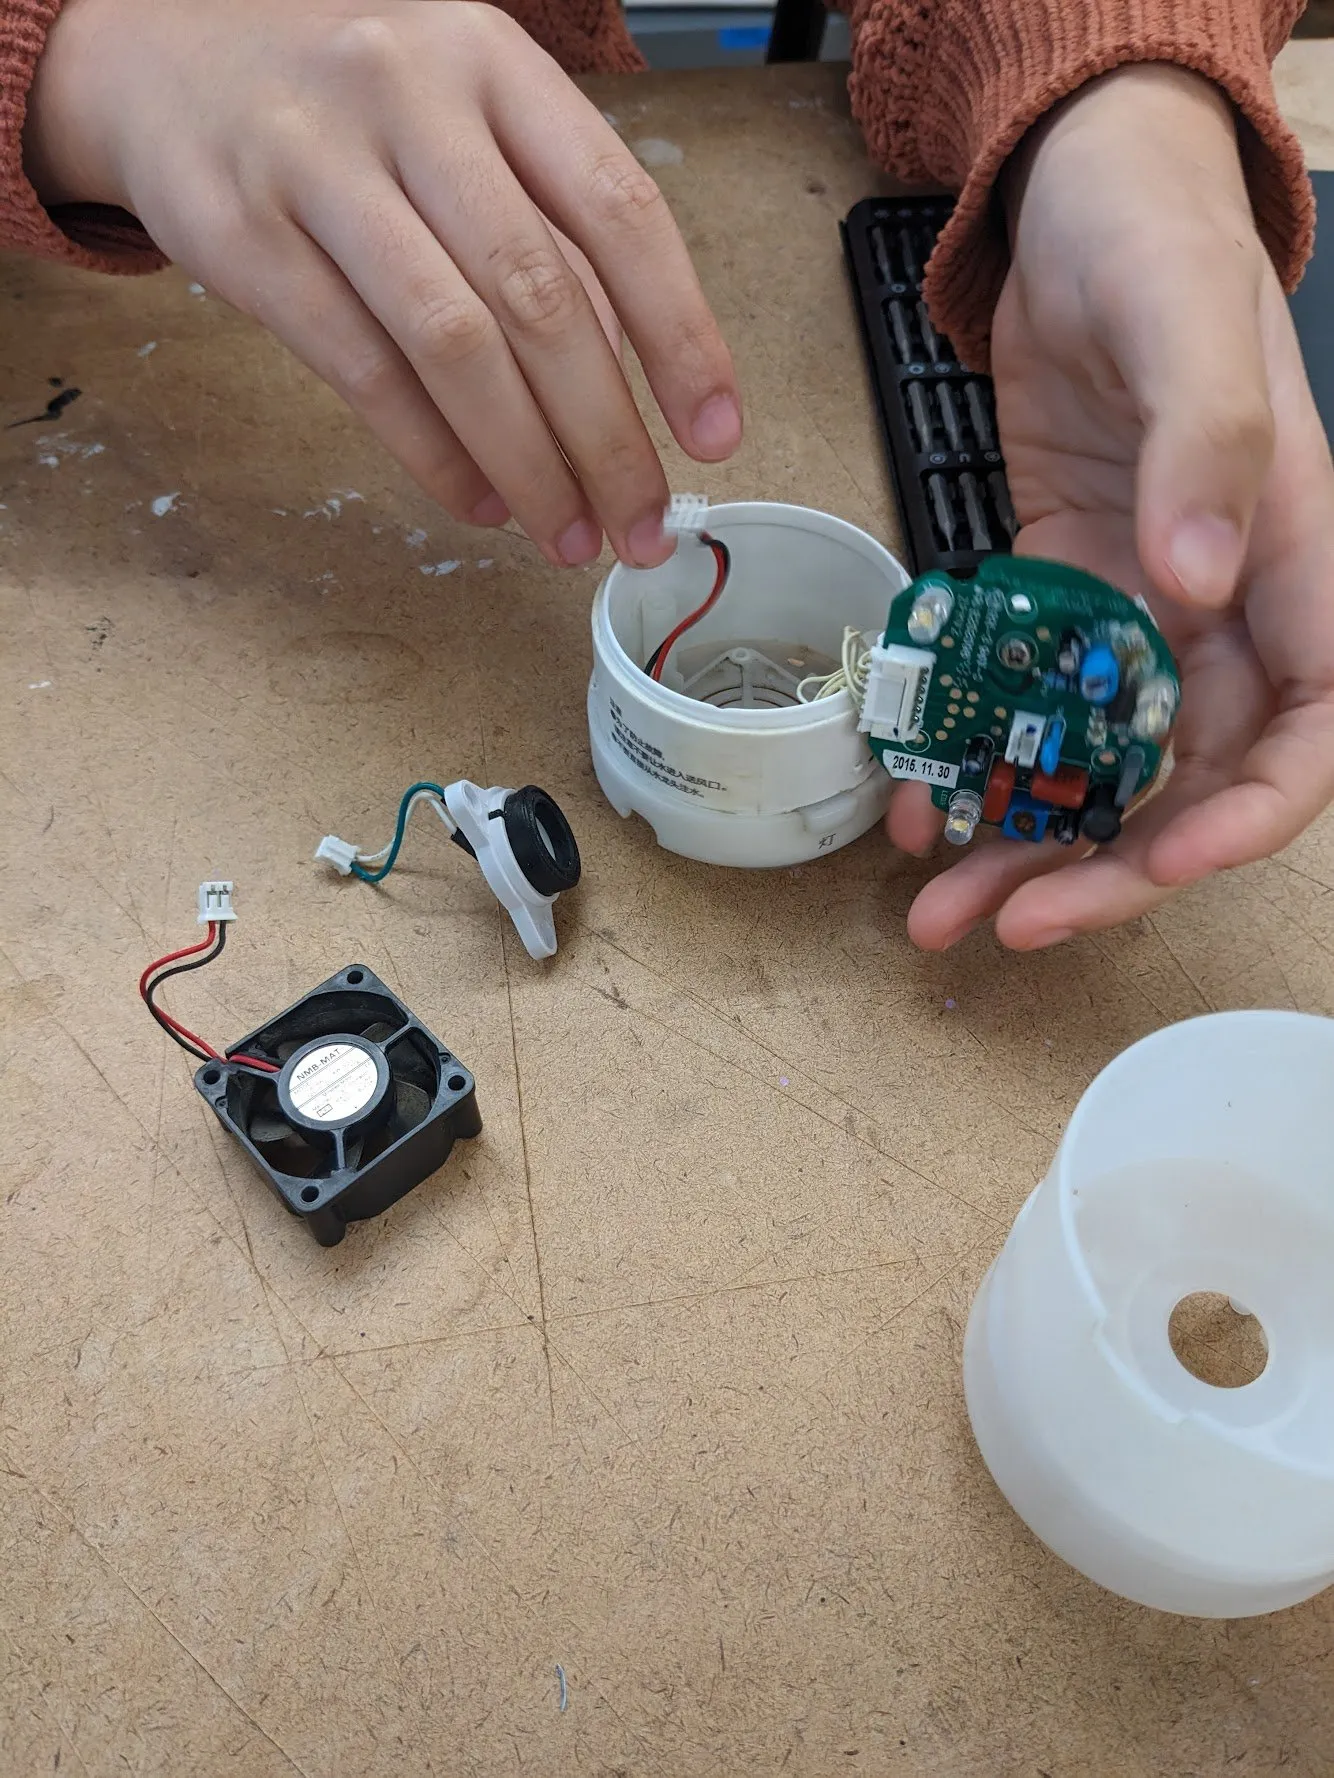
We were liking this ice bucket diffuser idea, so we took apart a MUJI diffuser.
We found it uses an ultrasonic vibration motor to "mistify" water. We thought the fan blew the vapor out, but it only cools down a transistor.
I keep calling it a motor, but that's not really what it is! Nothing in there spins. It's a piezoelectric transducer: a little ceramic disc that flexes when you put voltage across it, so fast that it vibrates at ultrasonic frequencies way above anything you can hear. Sit it just under the surface of the water and those vibrations stack up ripples. Once the peaks get steep enough, the tips break right off into a fine, cold fog.
Which is so cool to me! The mist isn't steam. Nothing gets hot. You're just shaking water hard enough that little bits of it fall off the top.
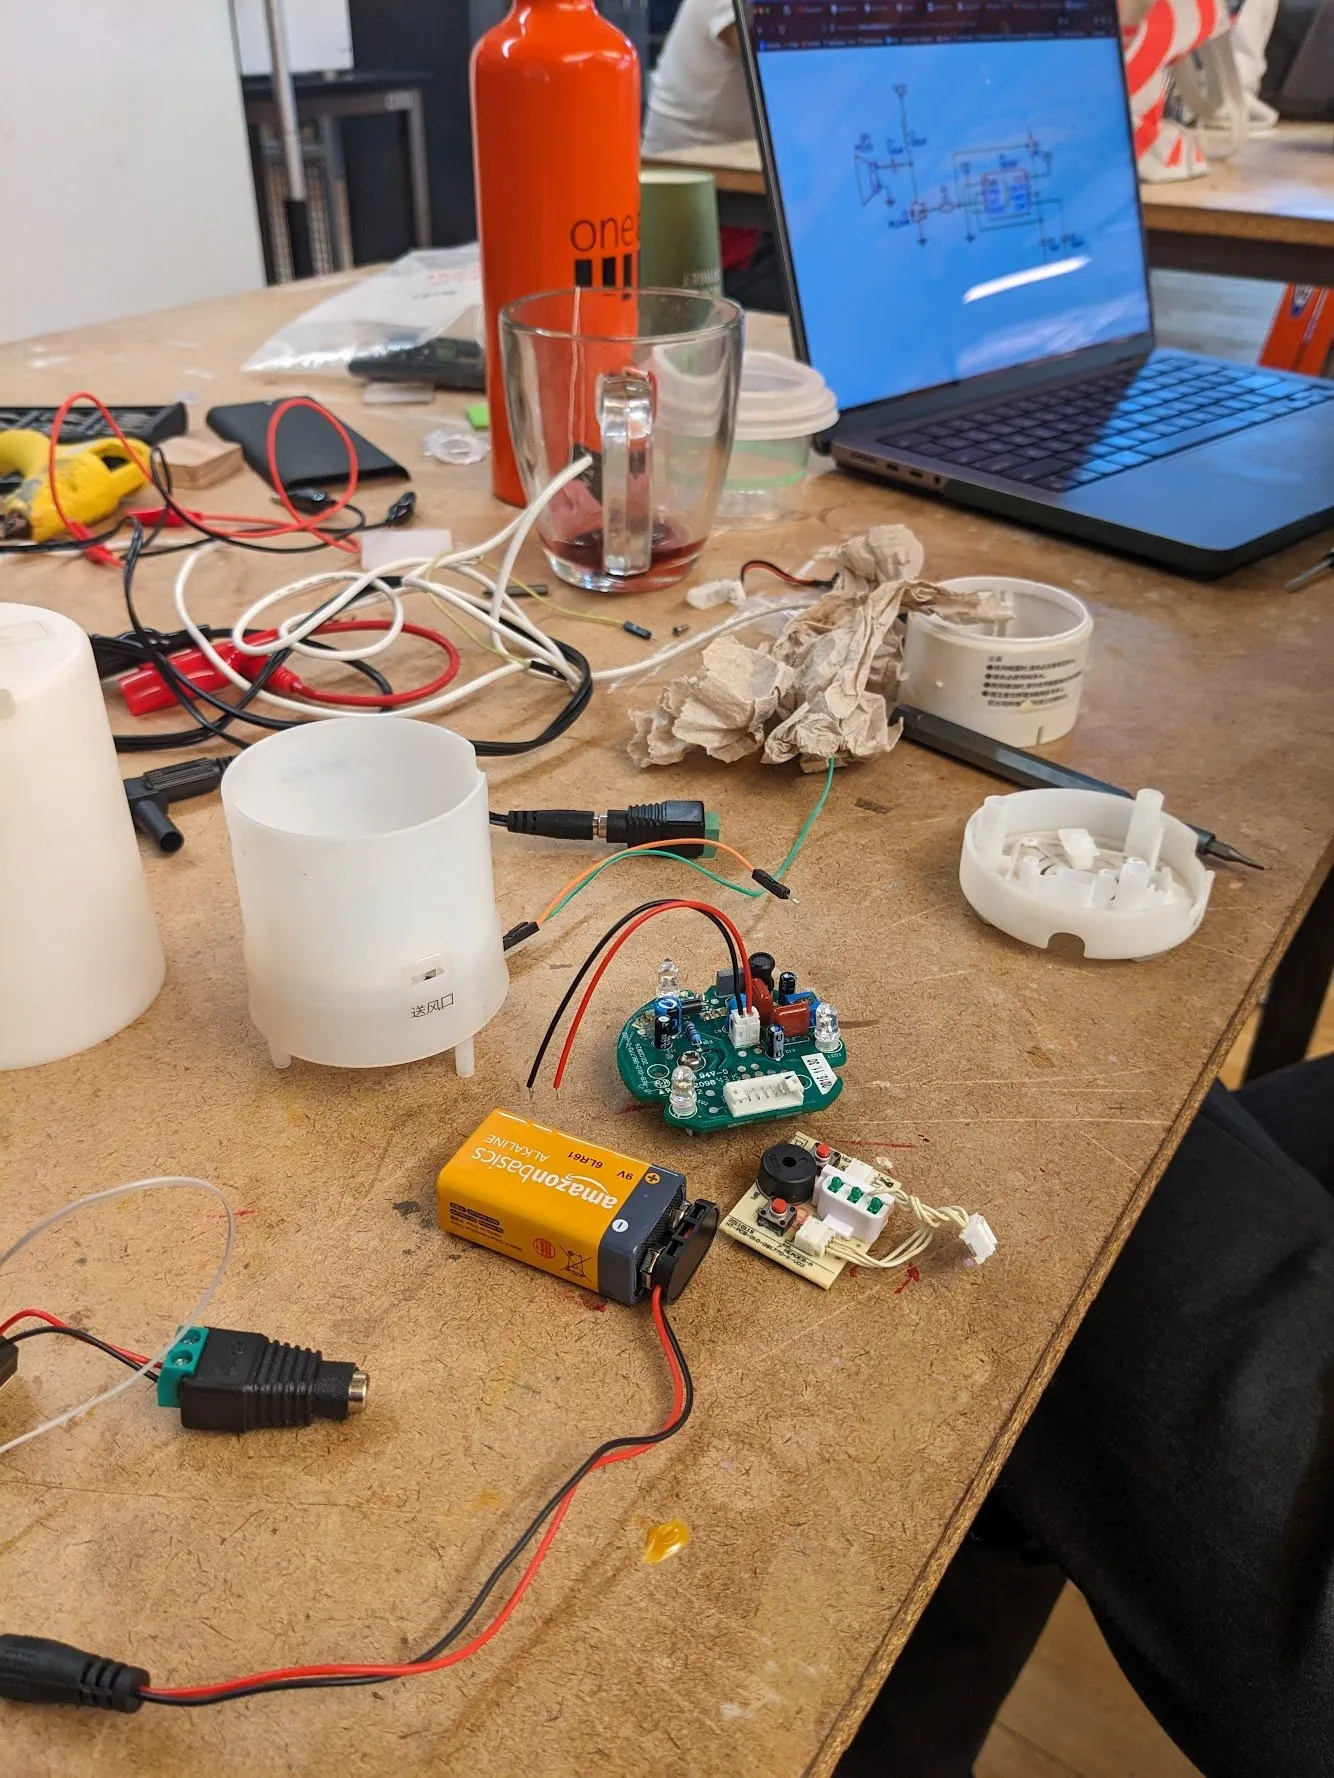
The motor + lights and buttons are on 2 different boards.
And that's exactly what made the salvaged guts annoying to reuse. The motor was on one board, the lights and buttons on another, and both of them were built to sit inside a MUJI housing, not ours.
 |  |
Sketching the form
With that, it was time to sketch out our ice bucket diffuser idea.
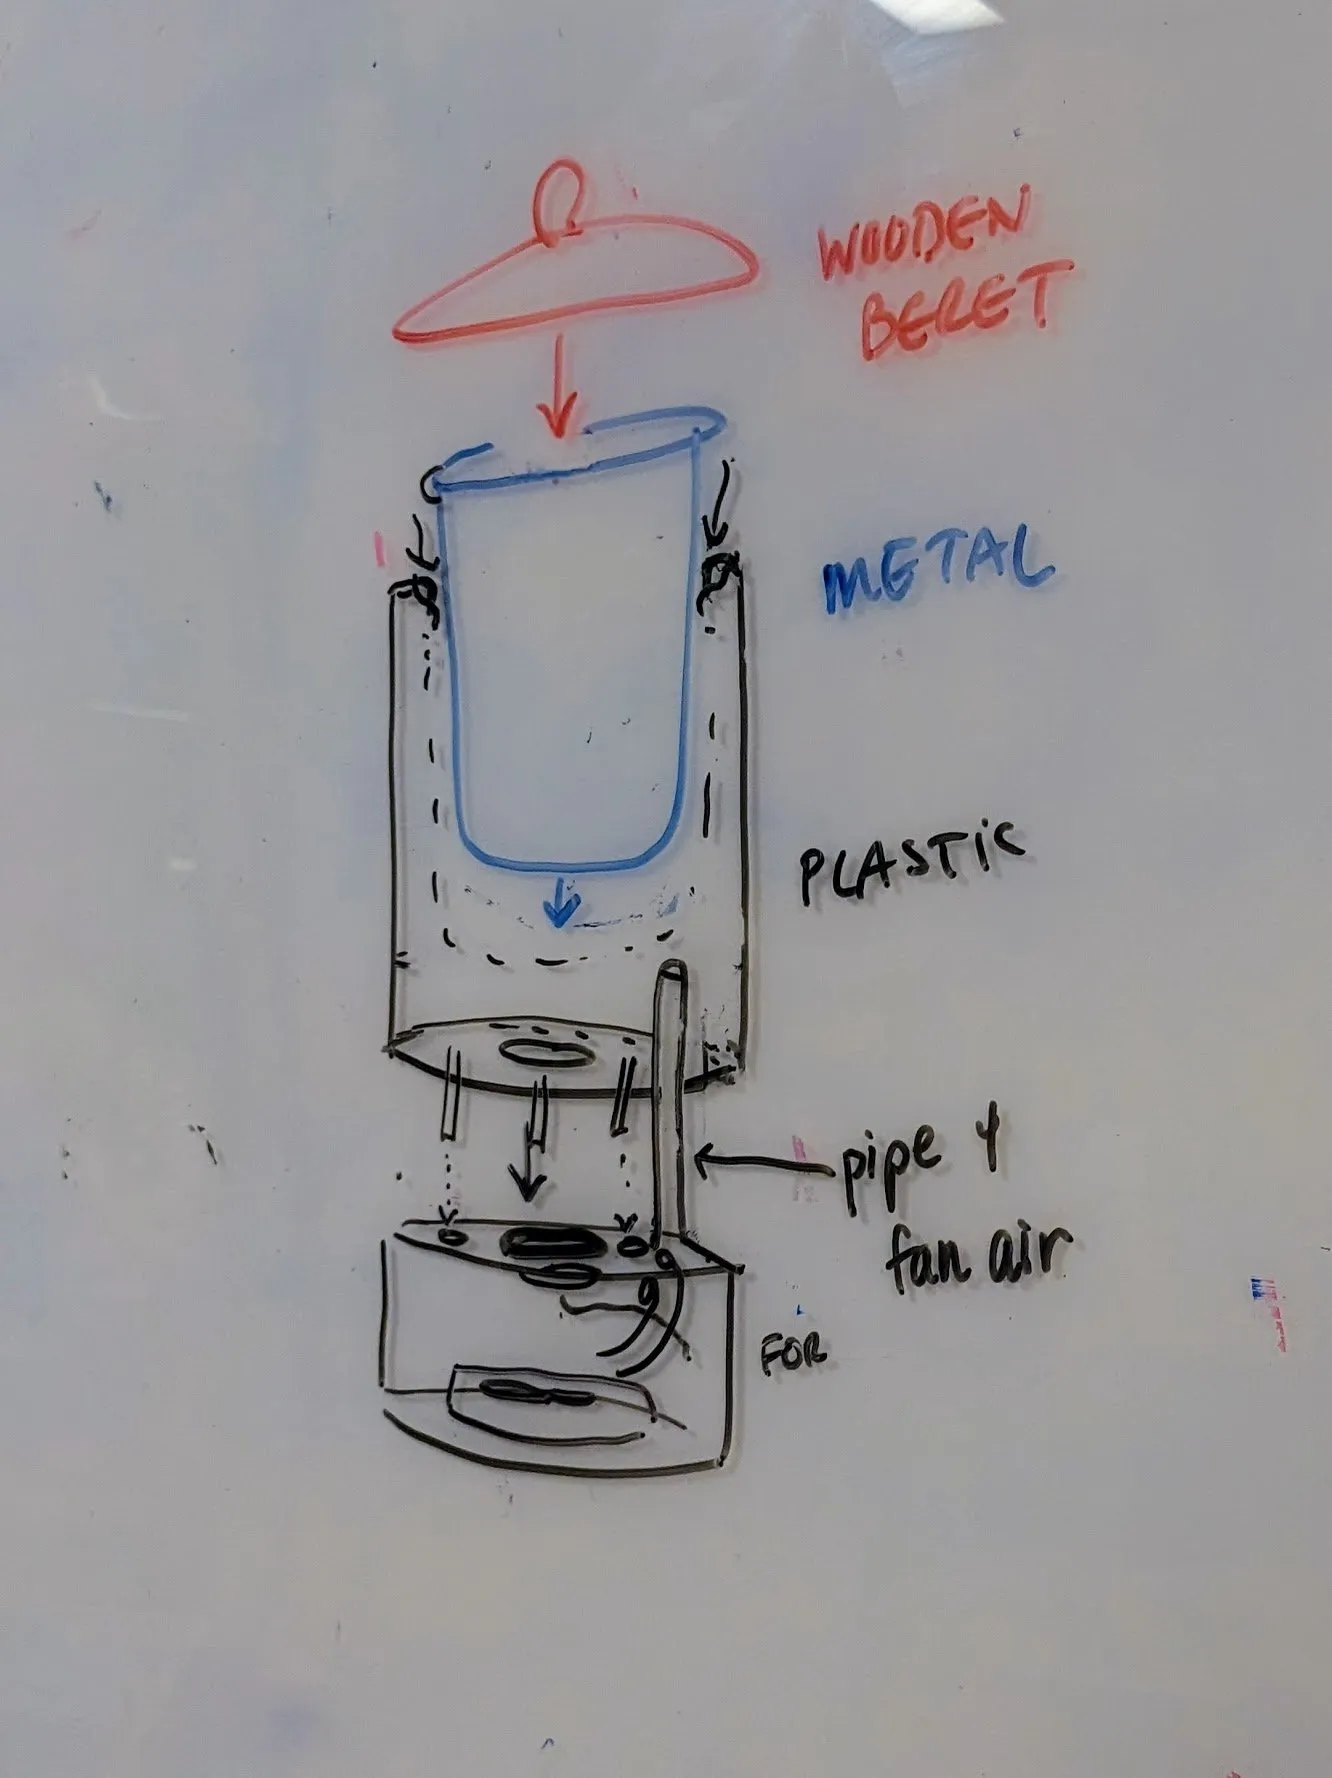 | The outer shell included the bucket itself, which had holes at the bottom for the ice water to seep into a chamber with the ultrasonic vibration motor to "mistify" into smell-good vapor that would be fanned out of a straw.Three materials stacked up: metal bucket, plastic shell, wooden lid. The lid is labelled WOODEN BERET on the whiteboard, and yes, we called it that for the rest of the project! |
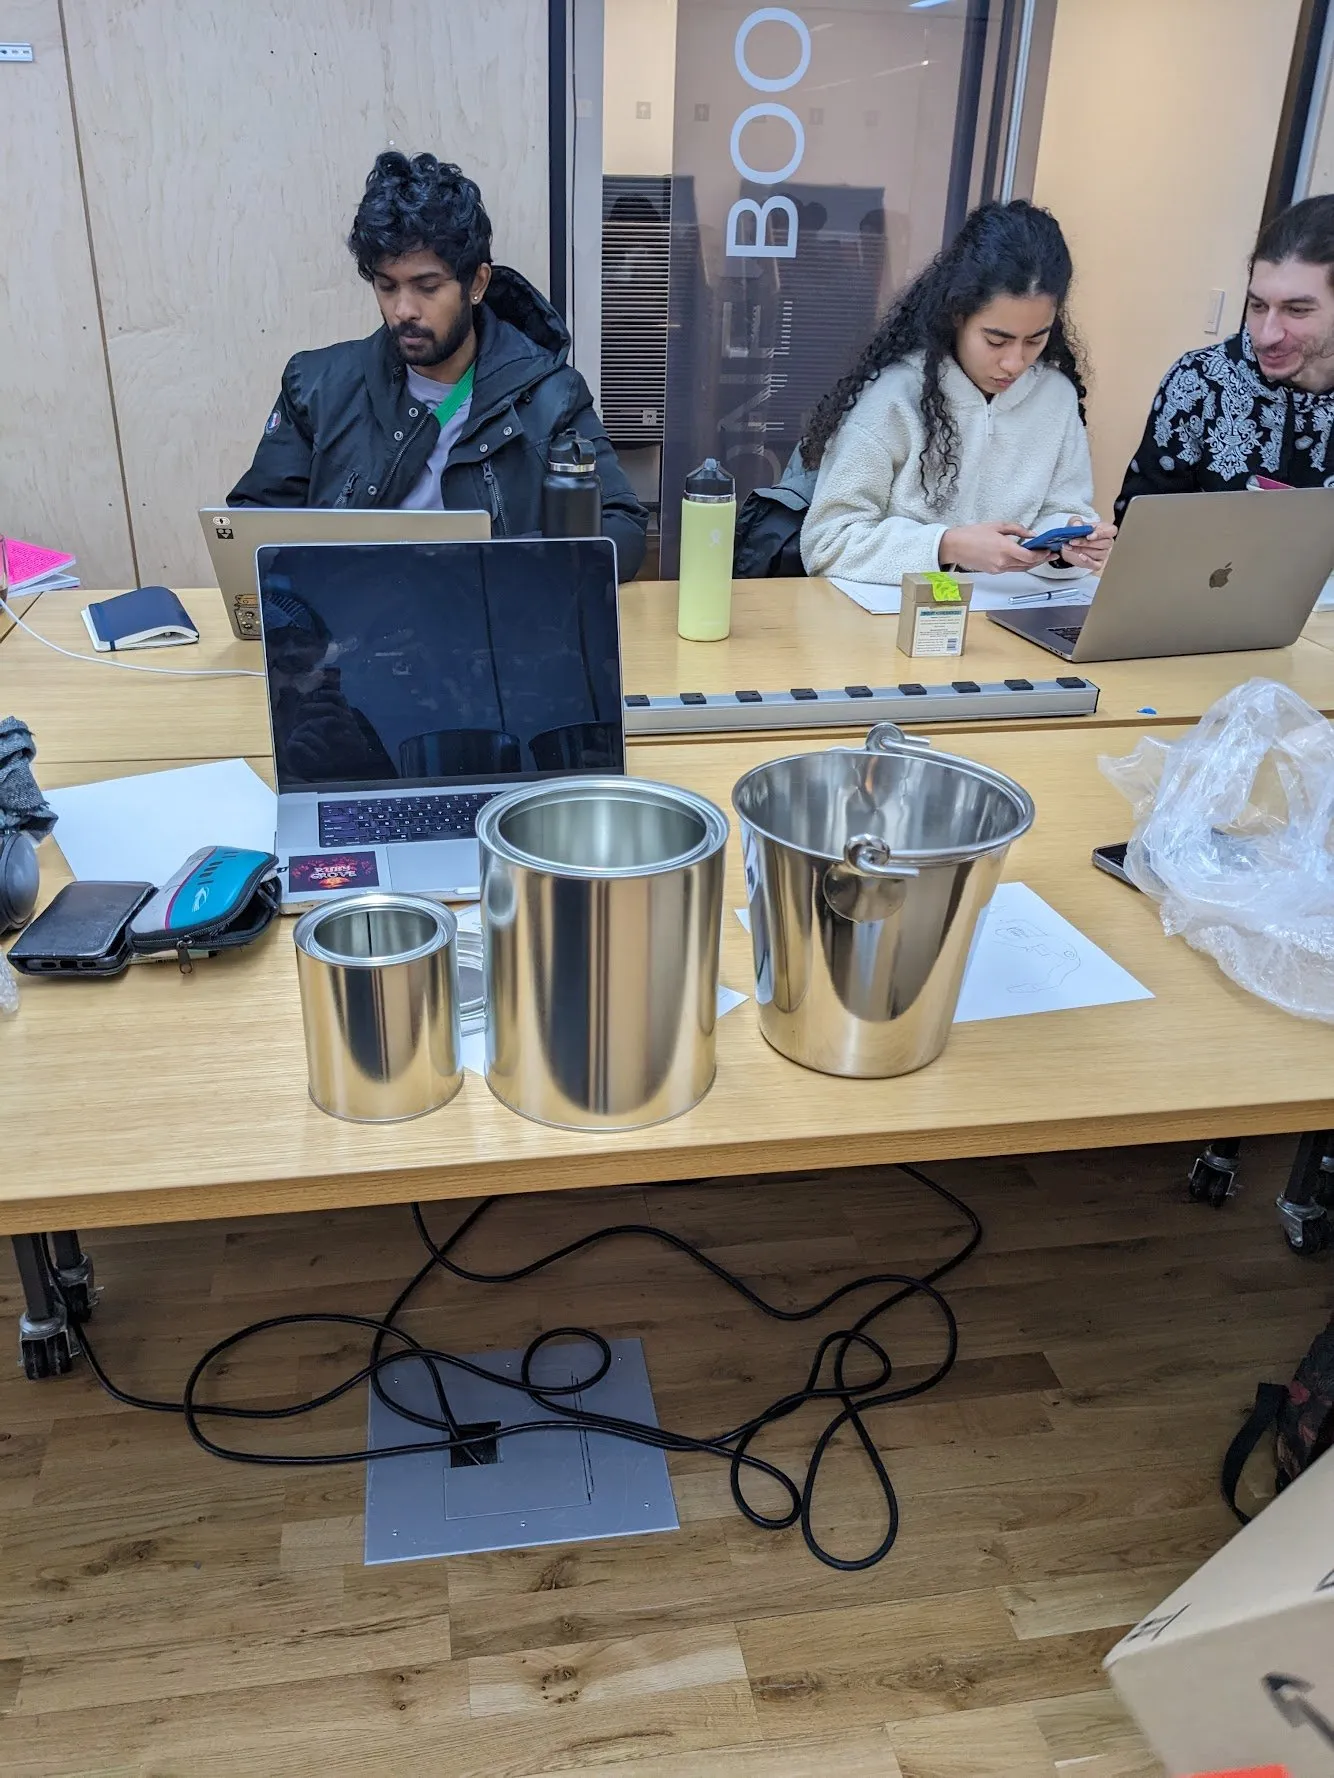
We bought a bucket and a pail to try to use as our ice bucket base.
The paint can came with a baby paint can, so that was unexpectedly cute!
Brushing the aluminum
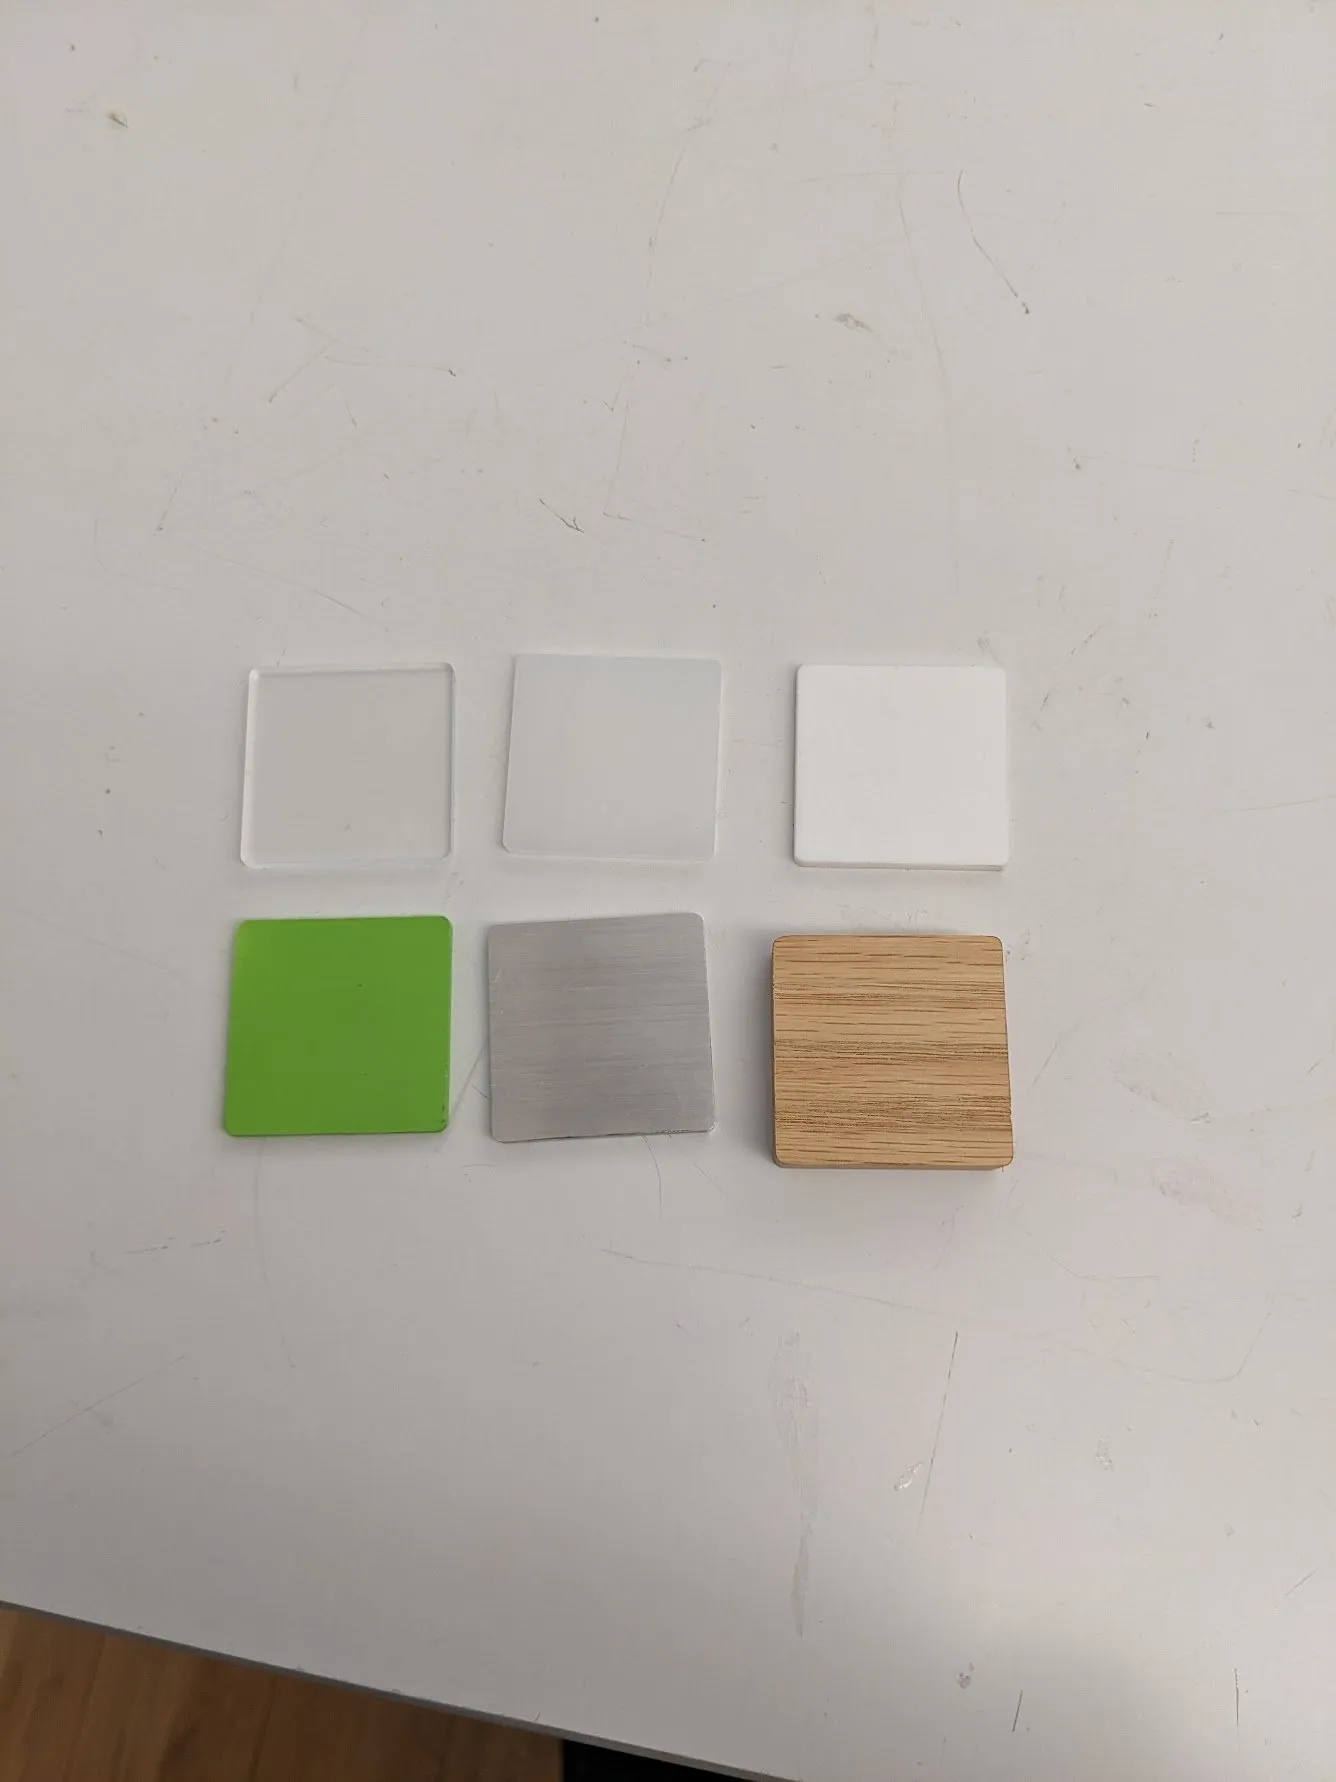
One of our requirements for this project was to match swatches for a specific design aesthetic.
The metal had to be a brushed aluminum, so that meant we had to brush the inside of our bucket ourselves.
We decided to make a custom dremel.
It only kinda worked but worked well enough.
Prototyping the shell
Getting the shape across
People had a hard time understanding what shape we wanted for our diffuser outer shell, so we made a crappy little model with cardboard and plastic.
Room for an ice bucket, but it still went over a basin/base.
It took maybe fifteen minutes and everyone immediately got it. Crappy little models are so underrated!
Detour #1: vacuum forming
We planned to create a mold and cast the diffuser shell but were informed
- type of urethane for the white we need is extremely toxic. The dangerous half of it is full of isocyanates, which are respiratory sensitizers. You can work with them fine for months until your body decides it's had enough, and after that even a tiny whiff can trigger asthma. If you ever work with this stuff, please use a real respirator and real ventilation!
- pouring it into such a thin mold without a pressure pot would be difficult. Mixing whips air bubbles into the resin, and a pressure pot is what squishes them down small enough to disappear. Our shell was thin enough that those bubbles wouldn't have been blemishes, they'd have been holes.
So we tried vacuum forming as an alternative. It seemed OK so far.
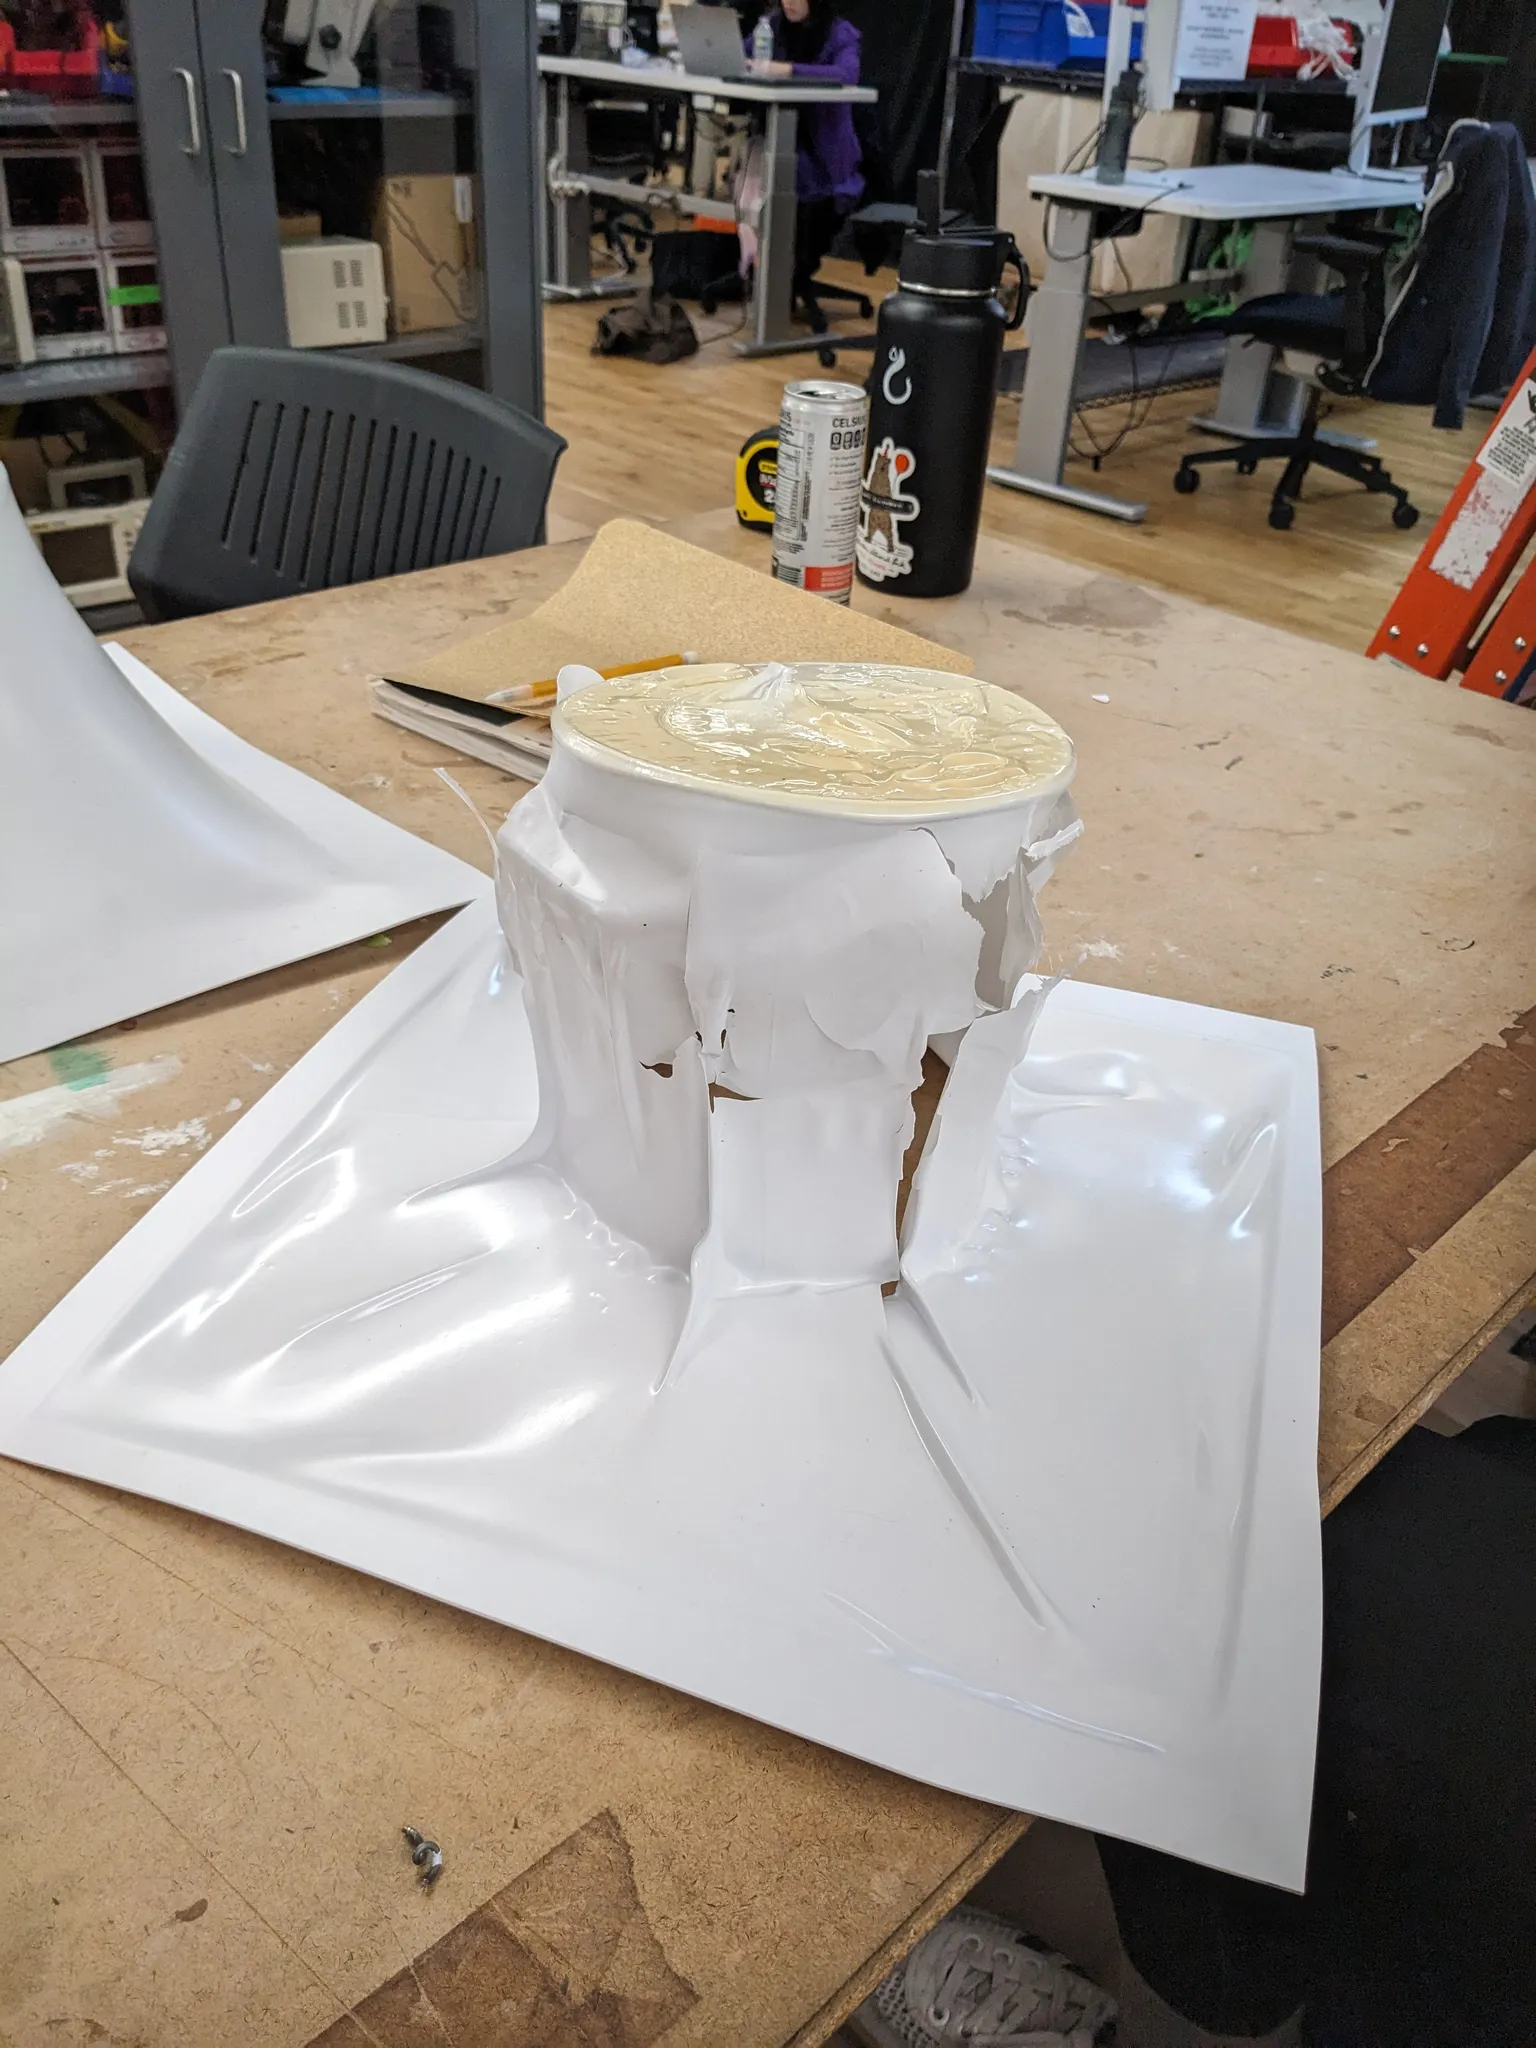
Hmmm vacuum forming plastics was still new to me. Still dialing it in! (The next three photos make that extremely clear.)
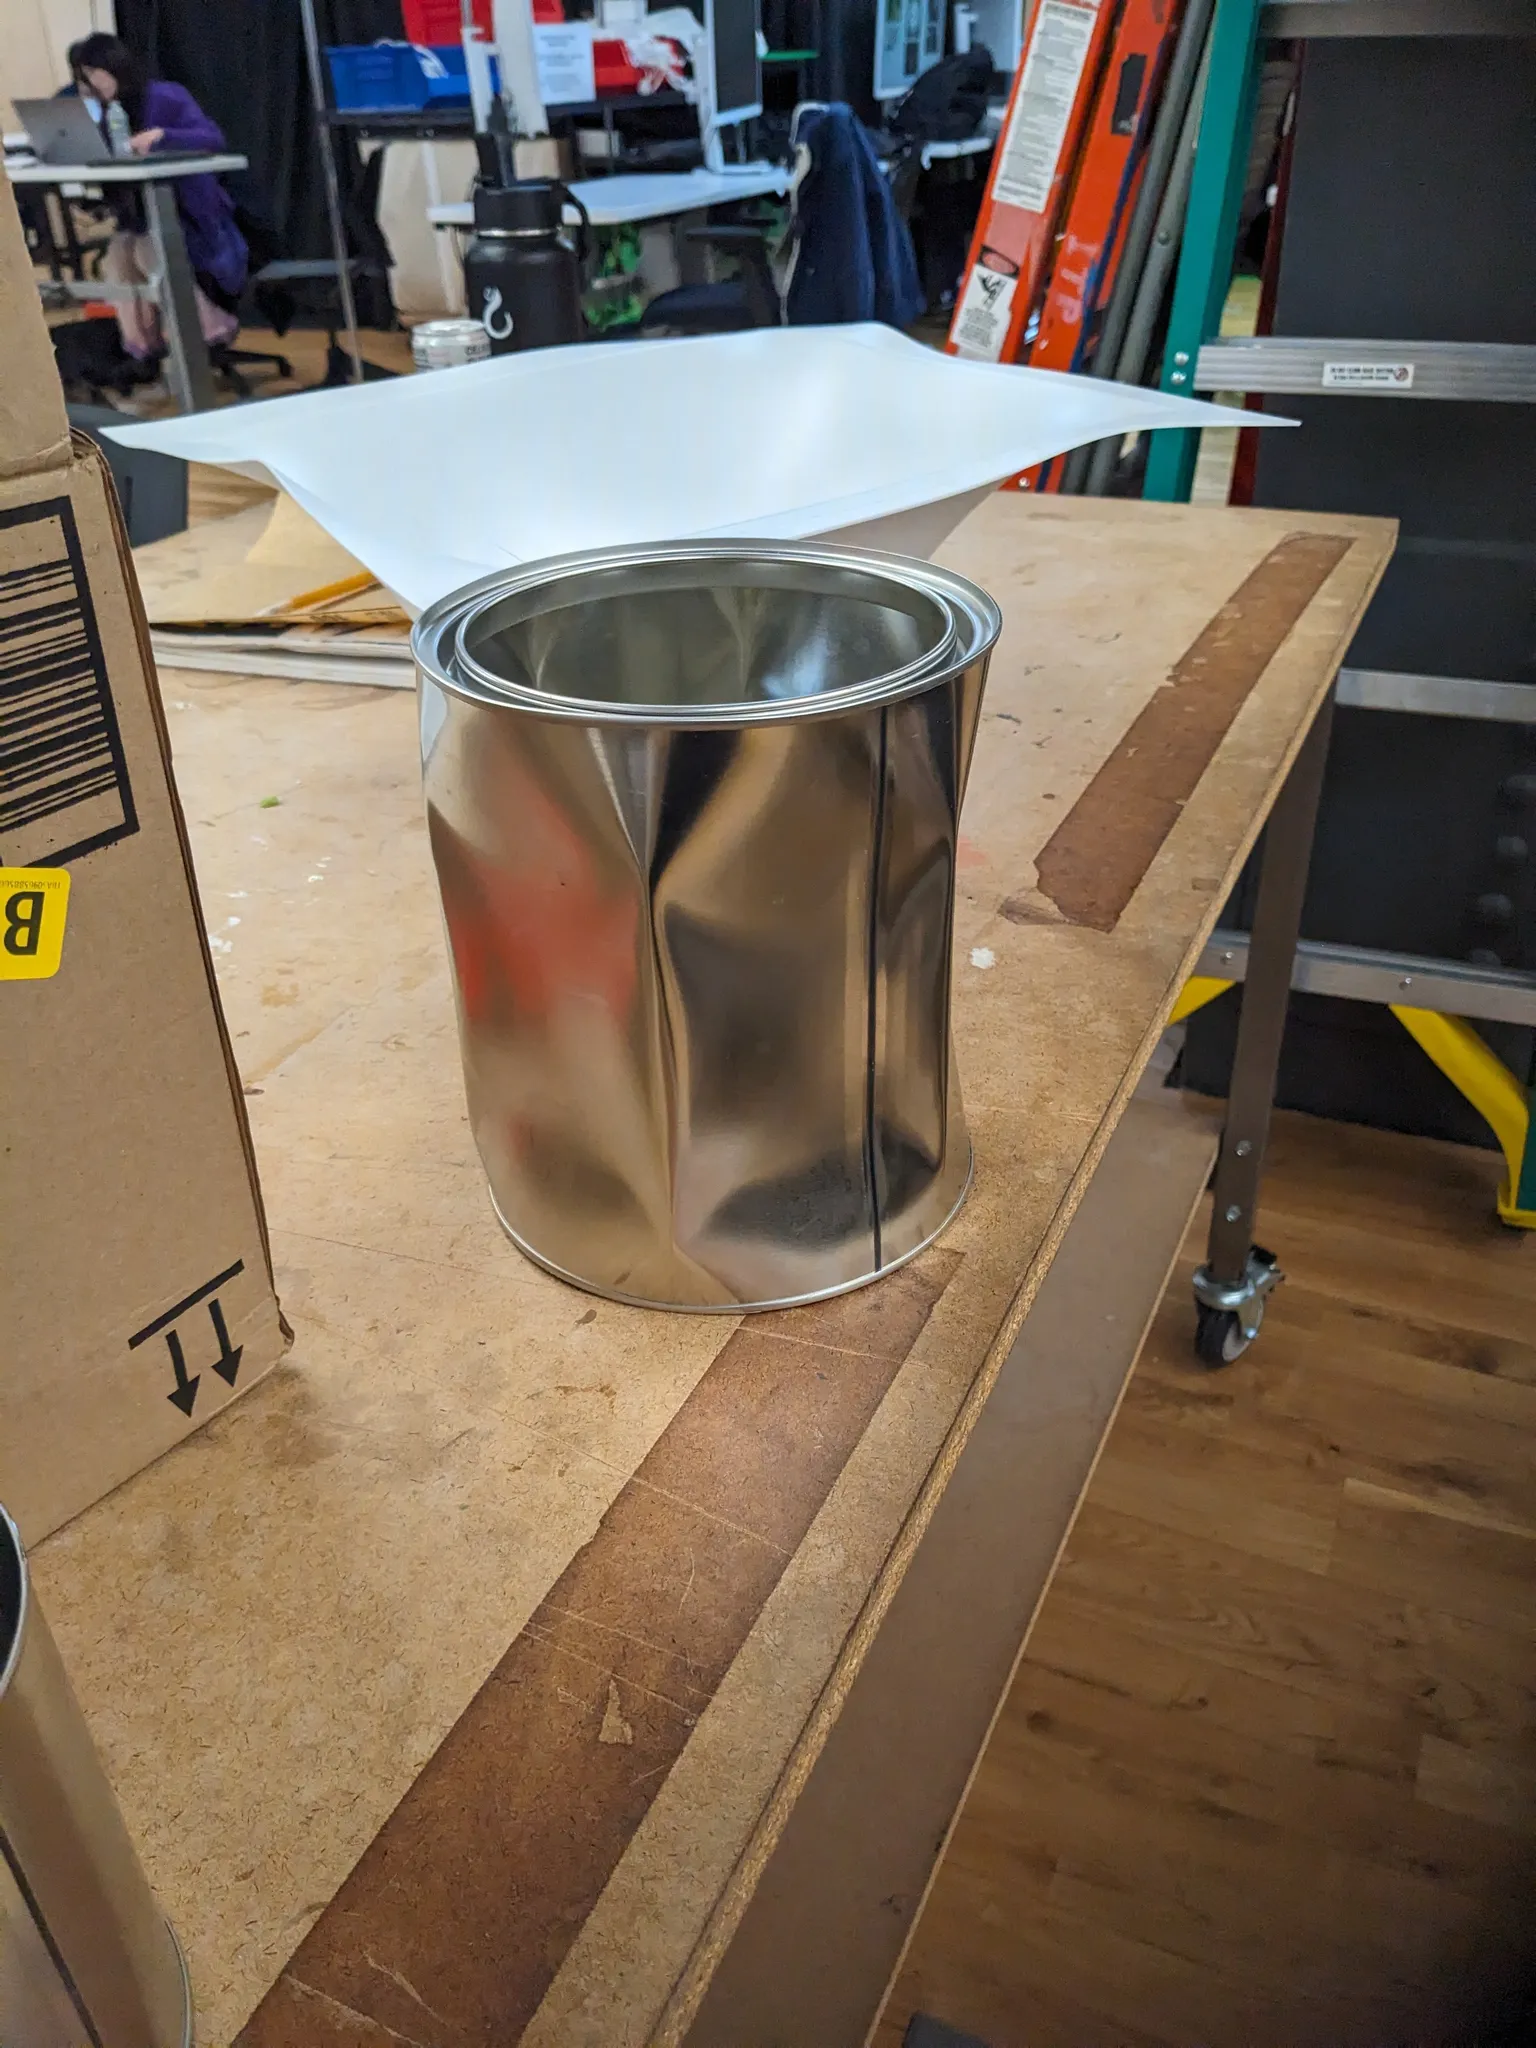
Funny I forgot how a vacuum might crush a thin aluminum can...
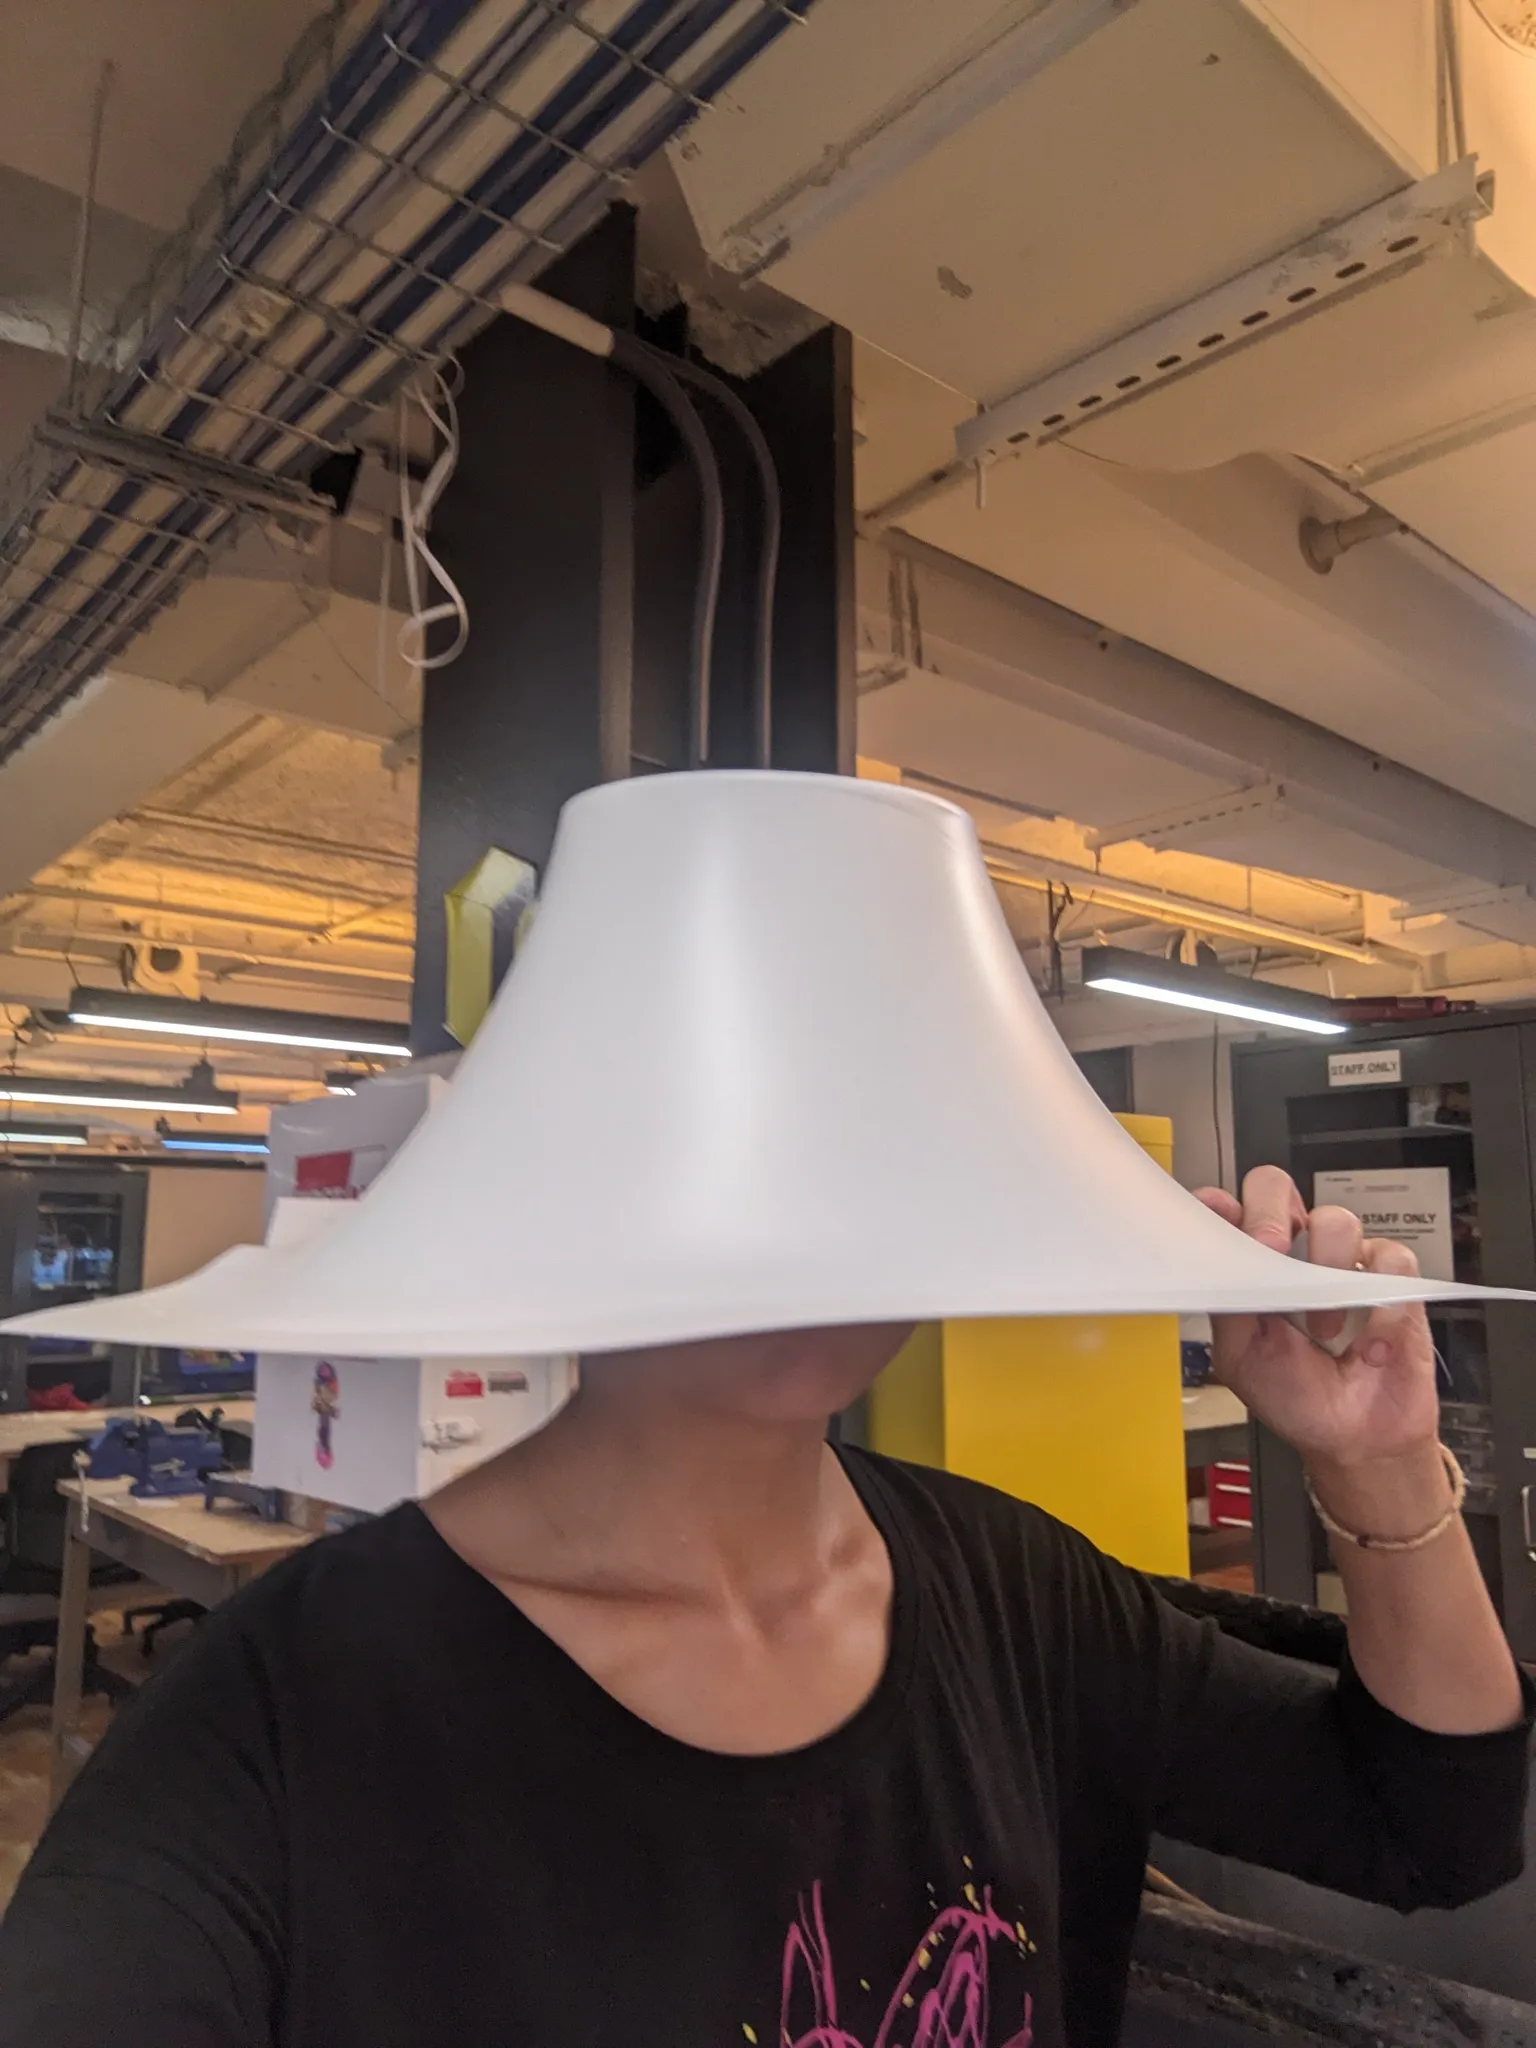
And no, the giant hat in the third photo was not a design direction! That's what happens when the sheet sags too far before the vacuum pulls. Obviously it got worn immediately.
 |  |  |
Detour #2: 3D printing
We originally threw out the idea of 3D printing because we thought the layer lines would be too distinct when used as a thin lampshade, but our professor convinced us we could do it.
So we ALSO threw 3D printing in. Long print times though!
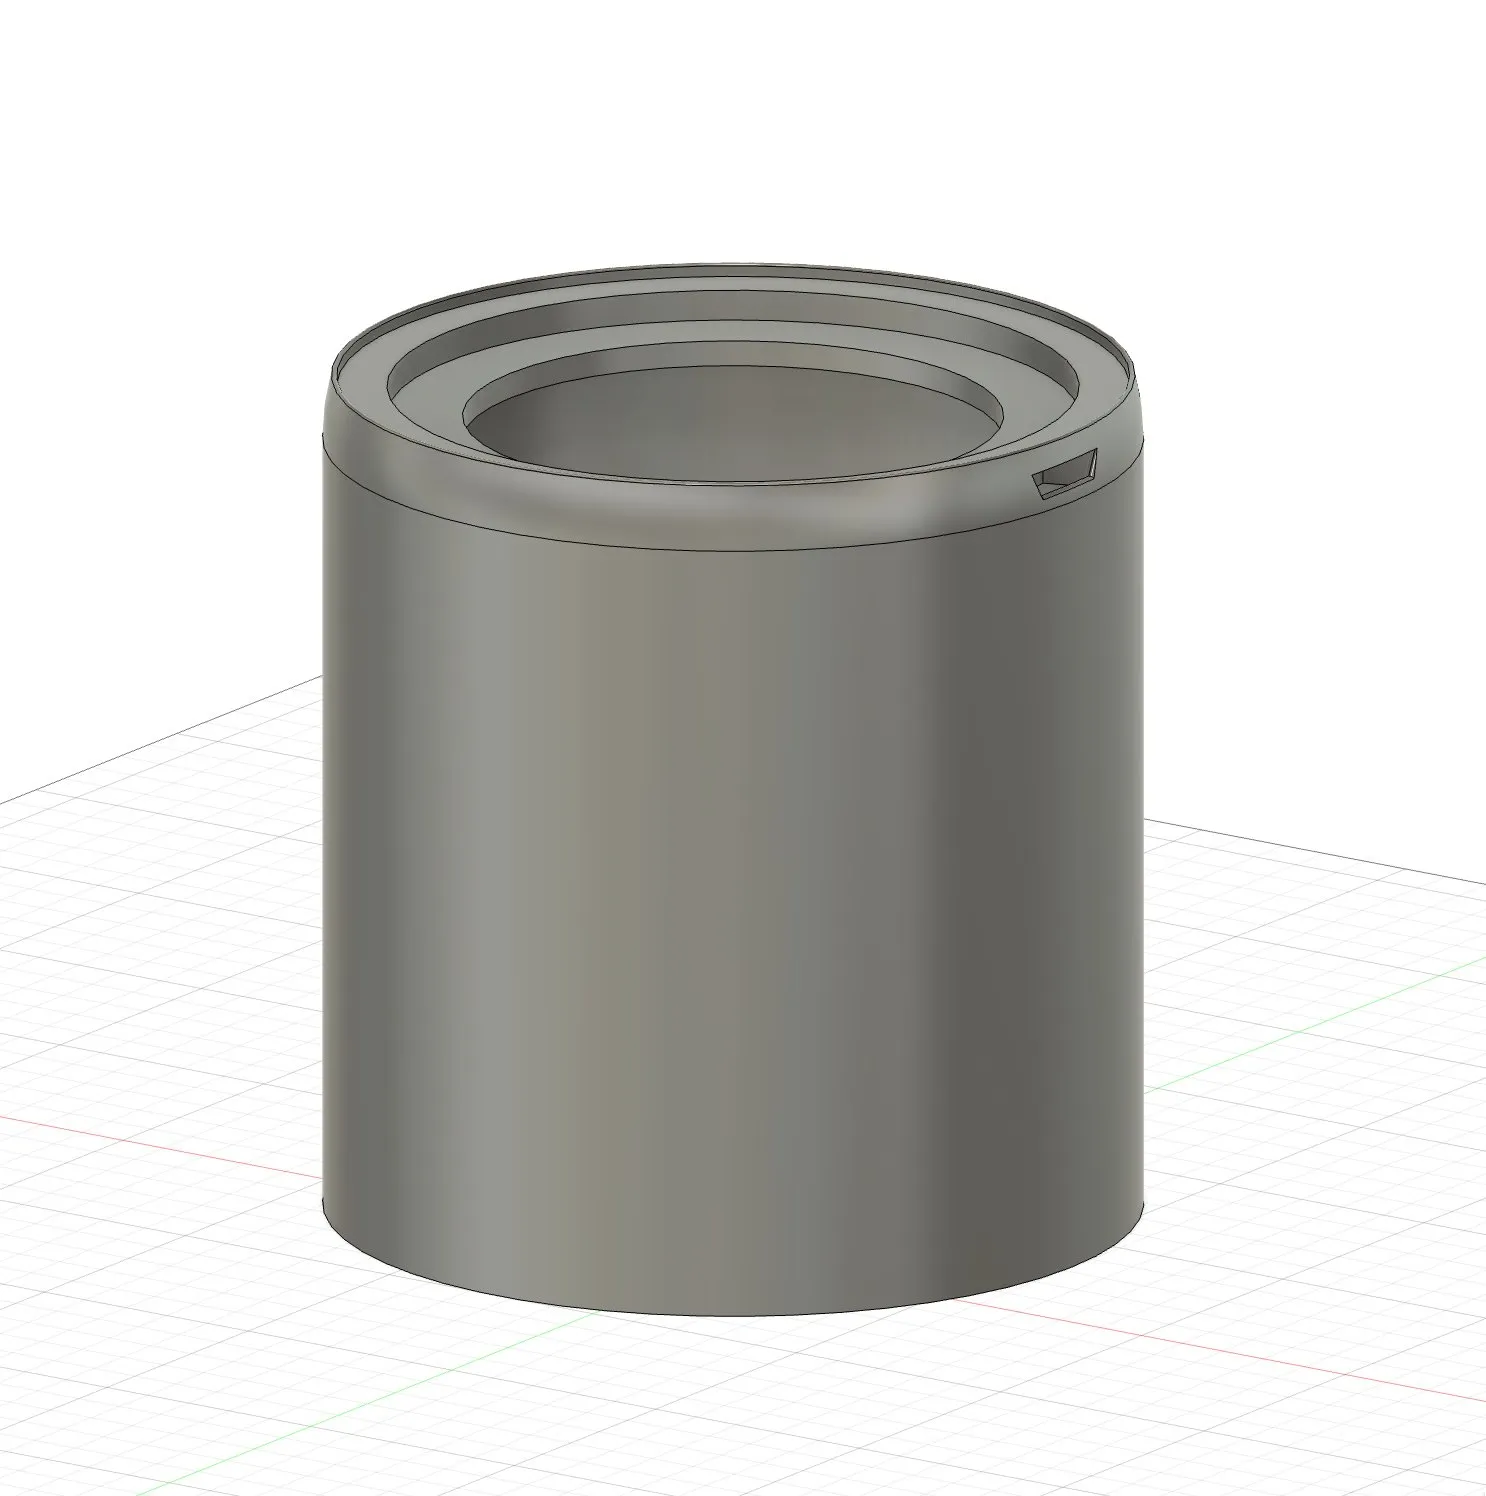 | 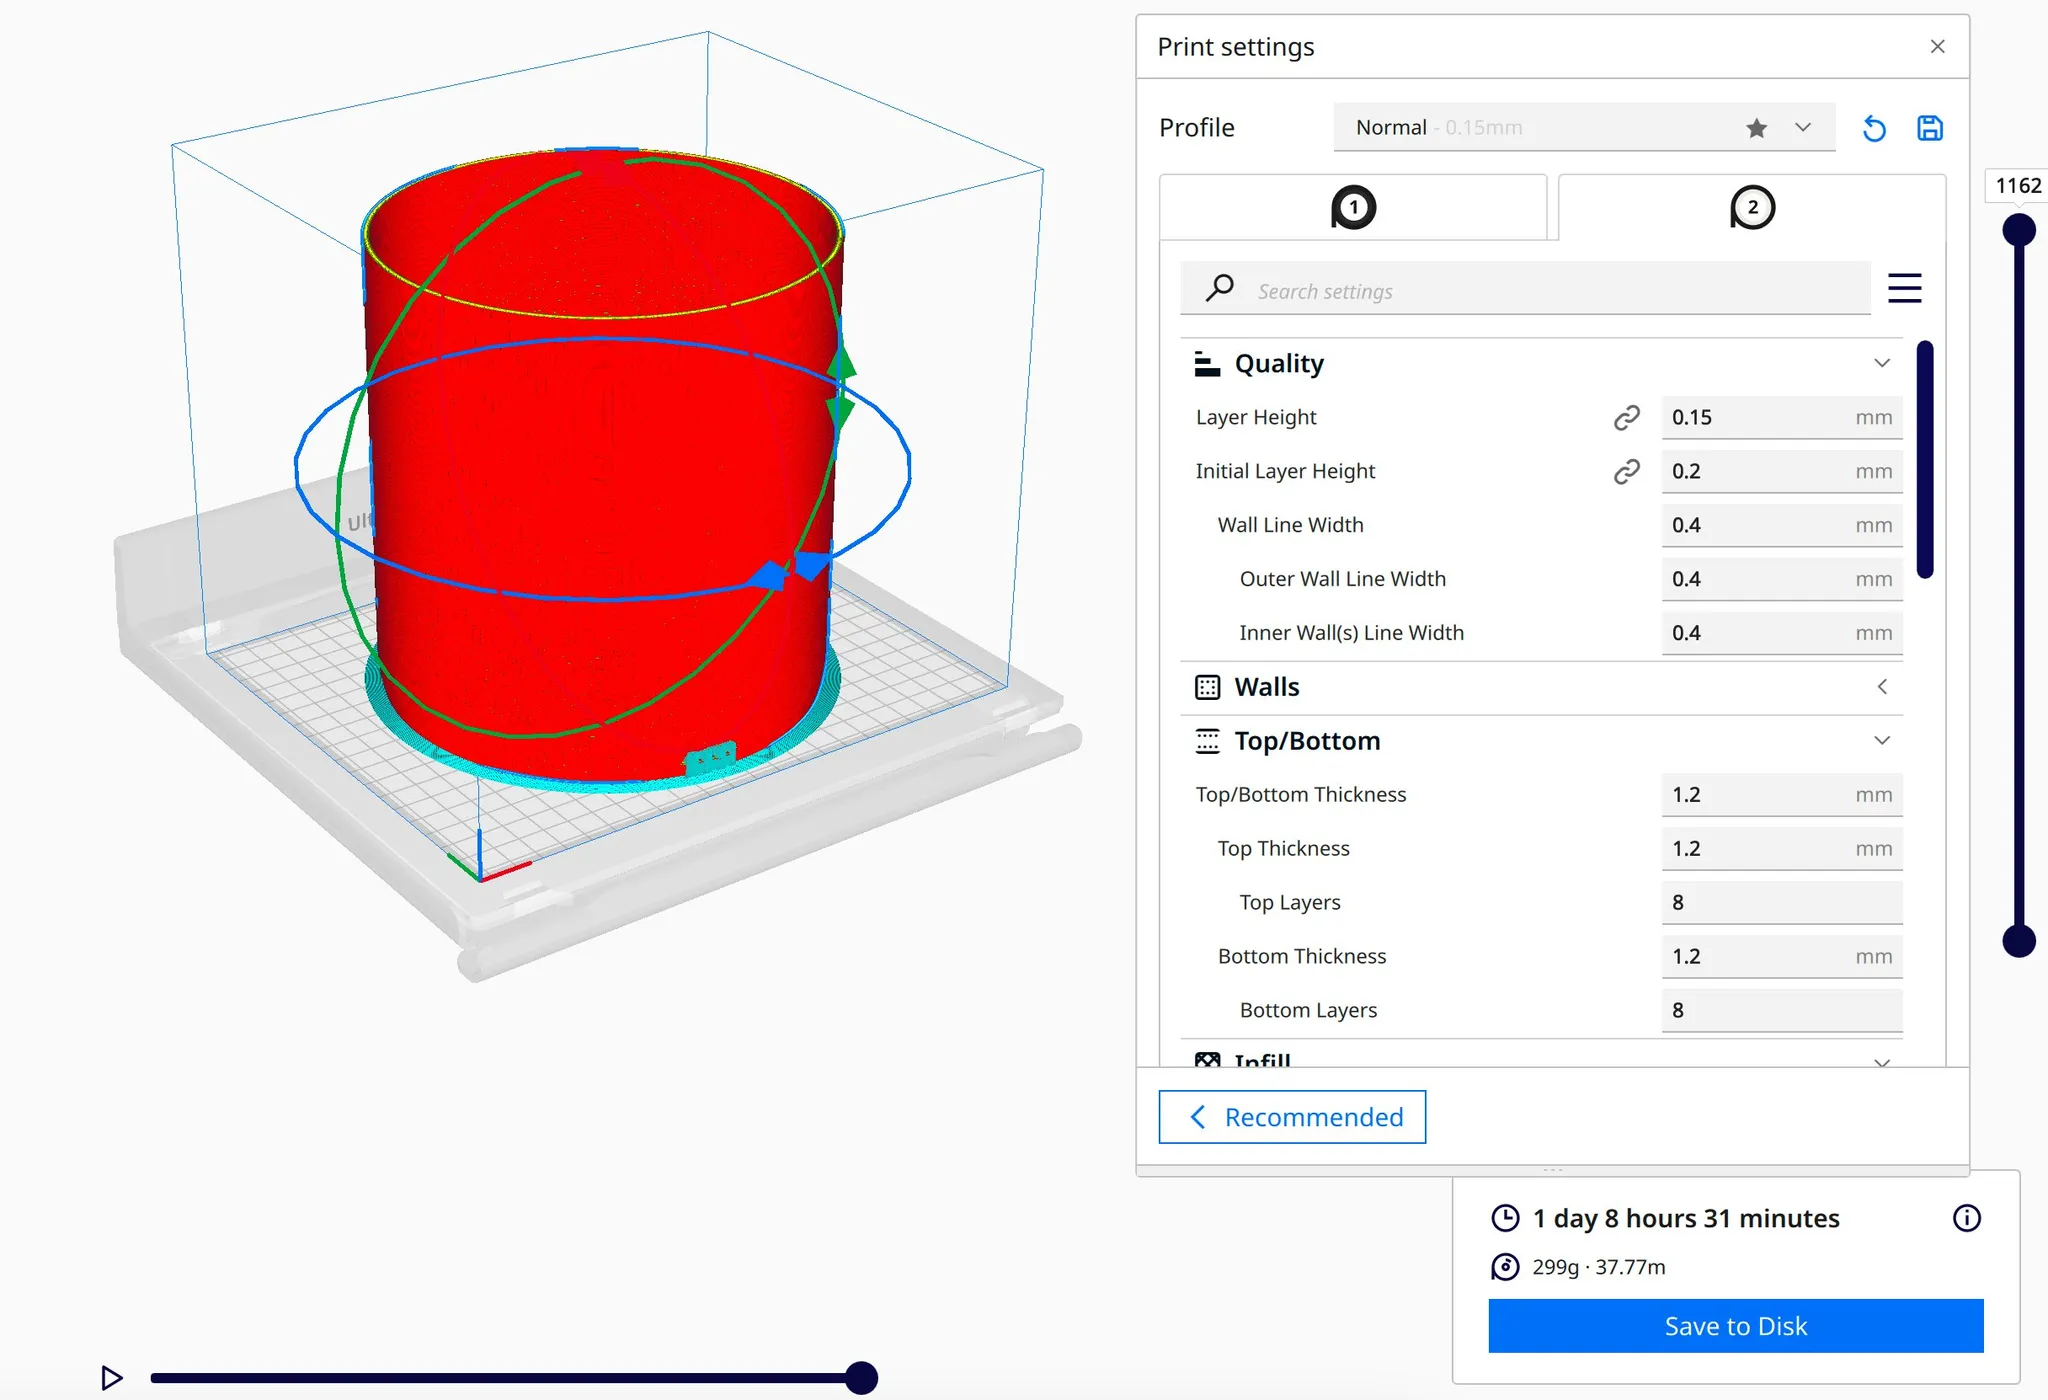 | 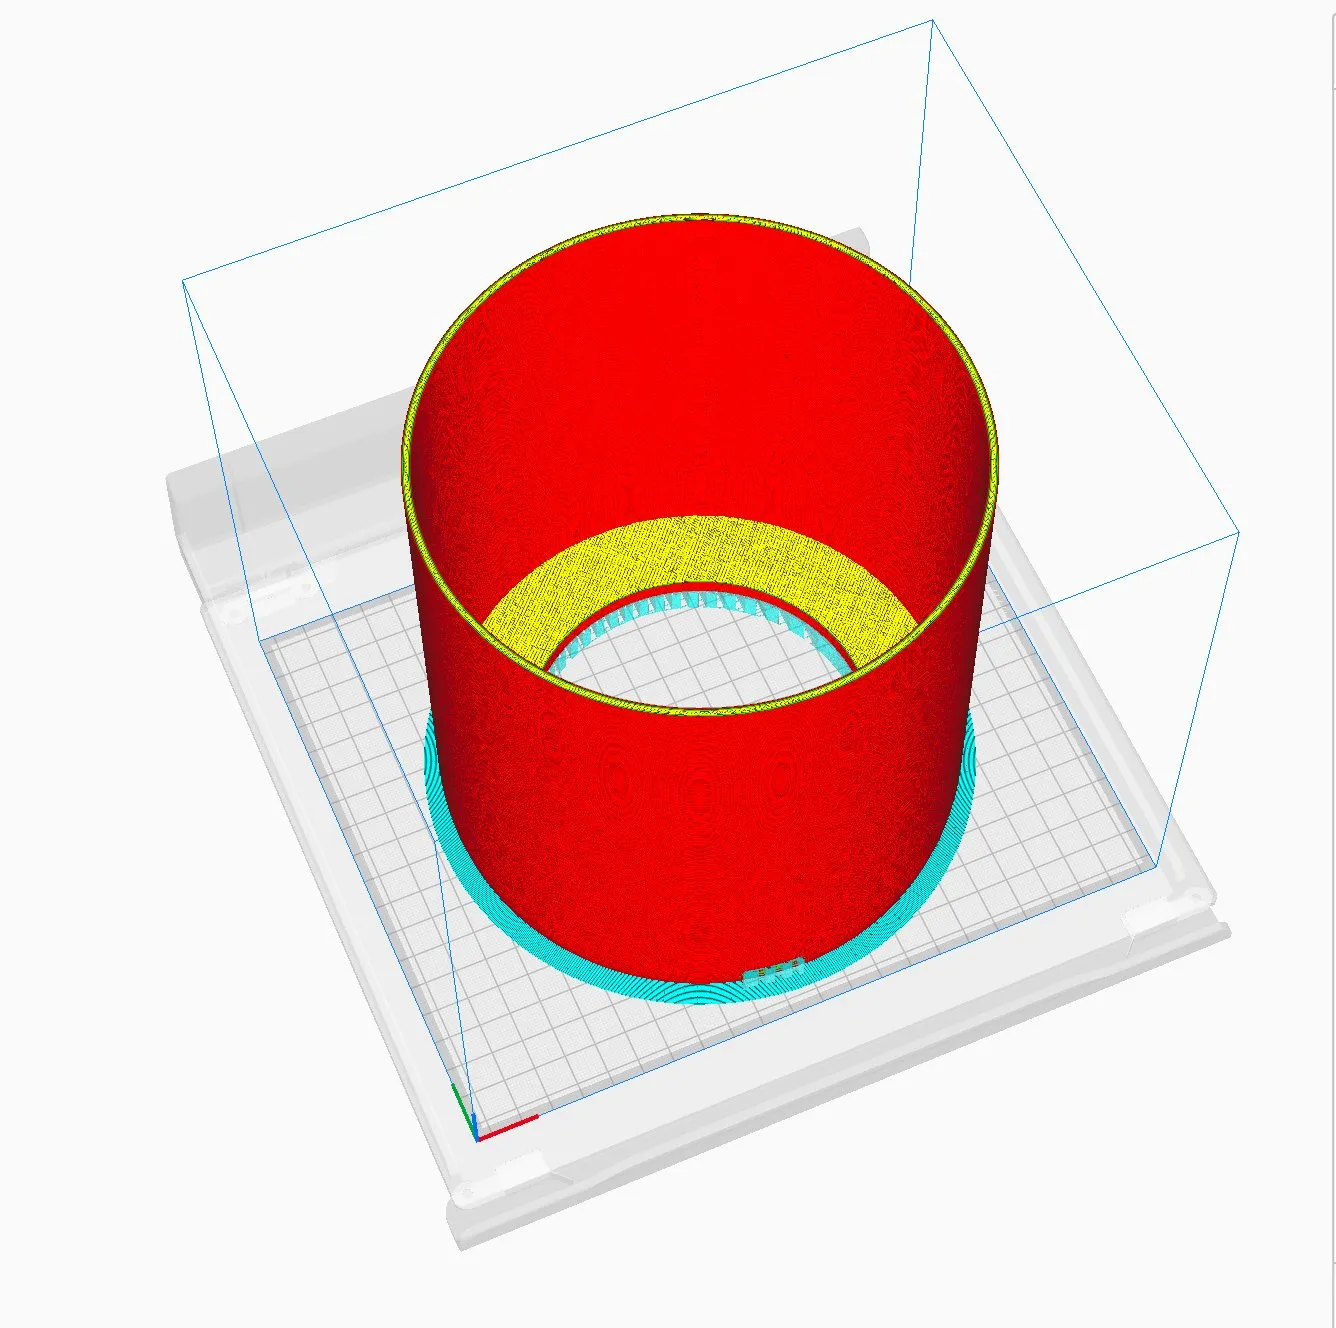 |
Well the print took > 3 days to print the right way up and 1 day to print upside down, both at settings with 2mm layer heights.
Orientation was the whole problem. Printed upright, the layers stack neatly around the cylinder and you get that nice even banding... but three days! Flipped upside down it's only a day, except now the overhanging lip needs support, and support marks against a surface that's supposed to glow is not something you can sand out of a thin translucent wall.
Had to abort a test print early because we realized the texture was super jank printing upside down.
Back to square 1!
Making it work
Let there be mist
Despite all my fabulous fabrication failures, we were making progress on the functionality.
| We decided not to use the board and components we salvaged from an existing diffuser and decided to do our own thing with a part we found at a Halloween store, the Flagmax Ultrasonic Mist Maker.It's normally sold as a fog maker for ponds, fish tanks and spooky Halloween displays. Same exact trick as the disc inside the MUJI diffuser, for a tiny fraction of the price.Best part: it shows up as a bare disc on a lead, so we could put it wherever our basin wanted it.Let there be mist! |
Modeling the basin
Next up was 3D modeling the basin and electronics housing for our diffuser. Highly inspired by MUJI's aromatic diffusers.
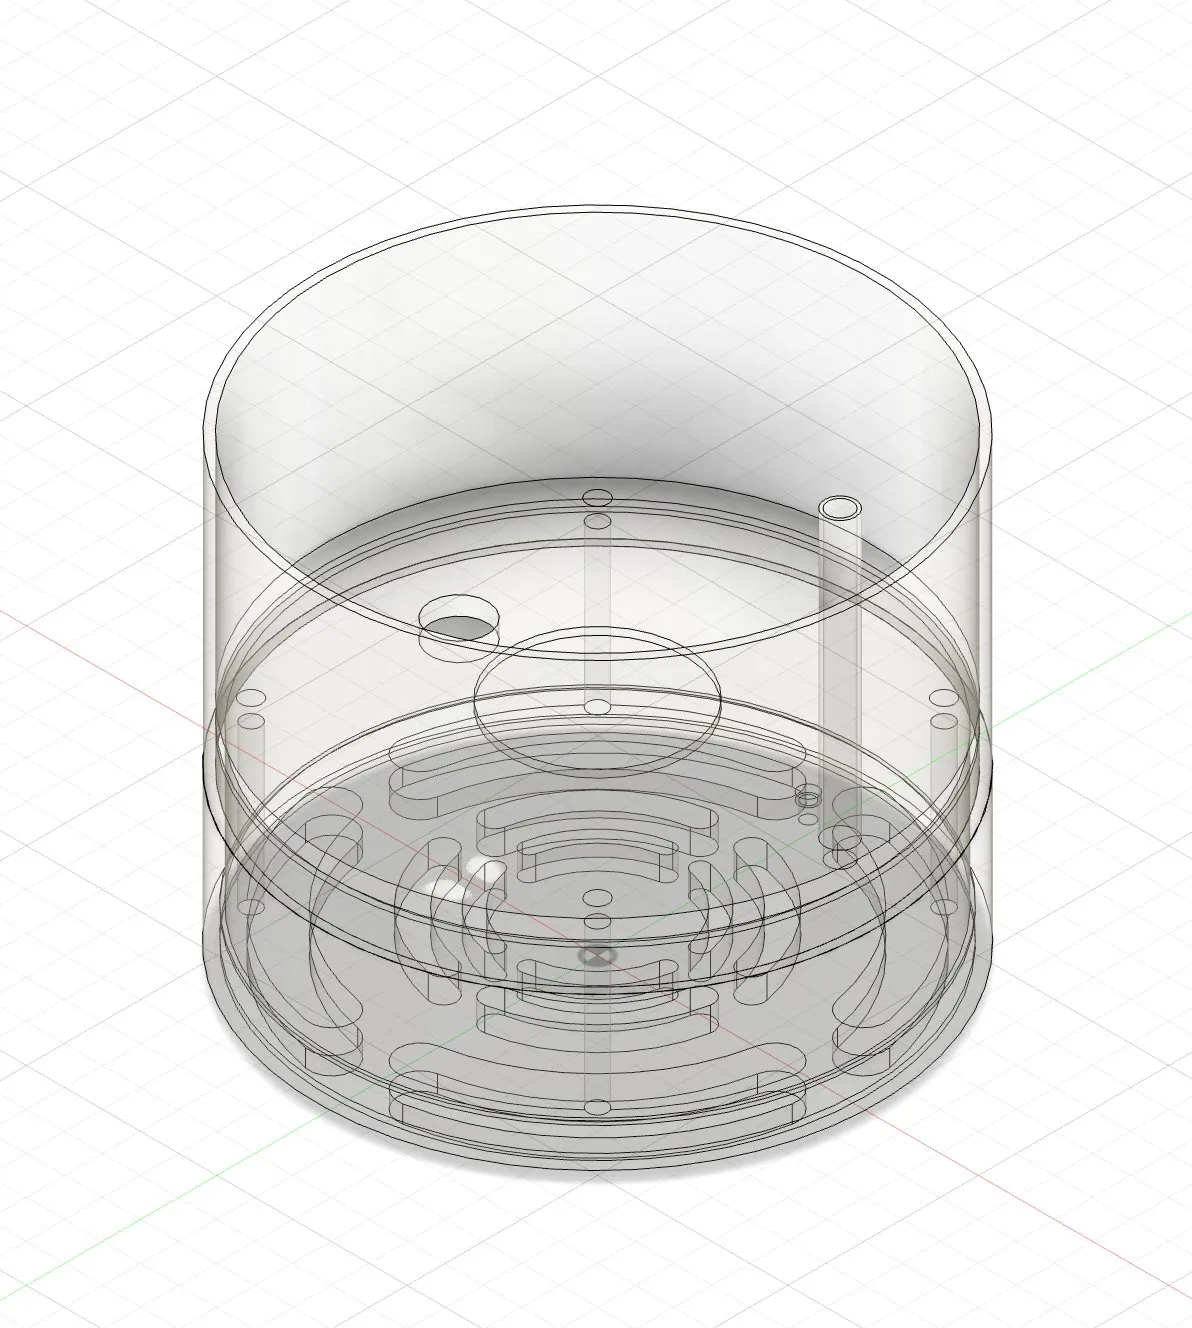 | 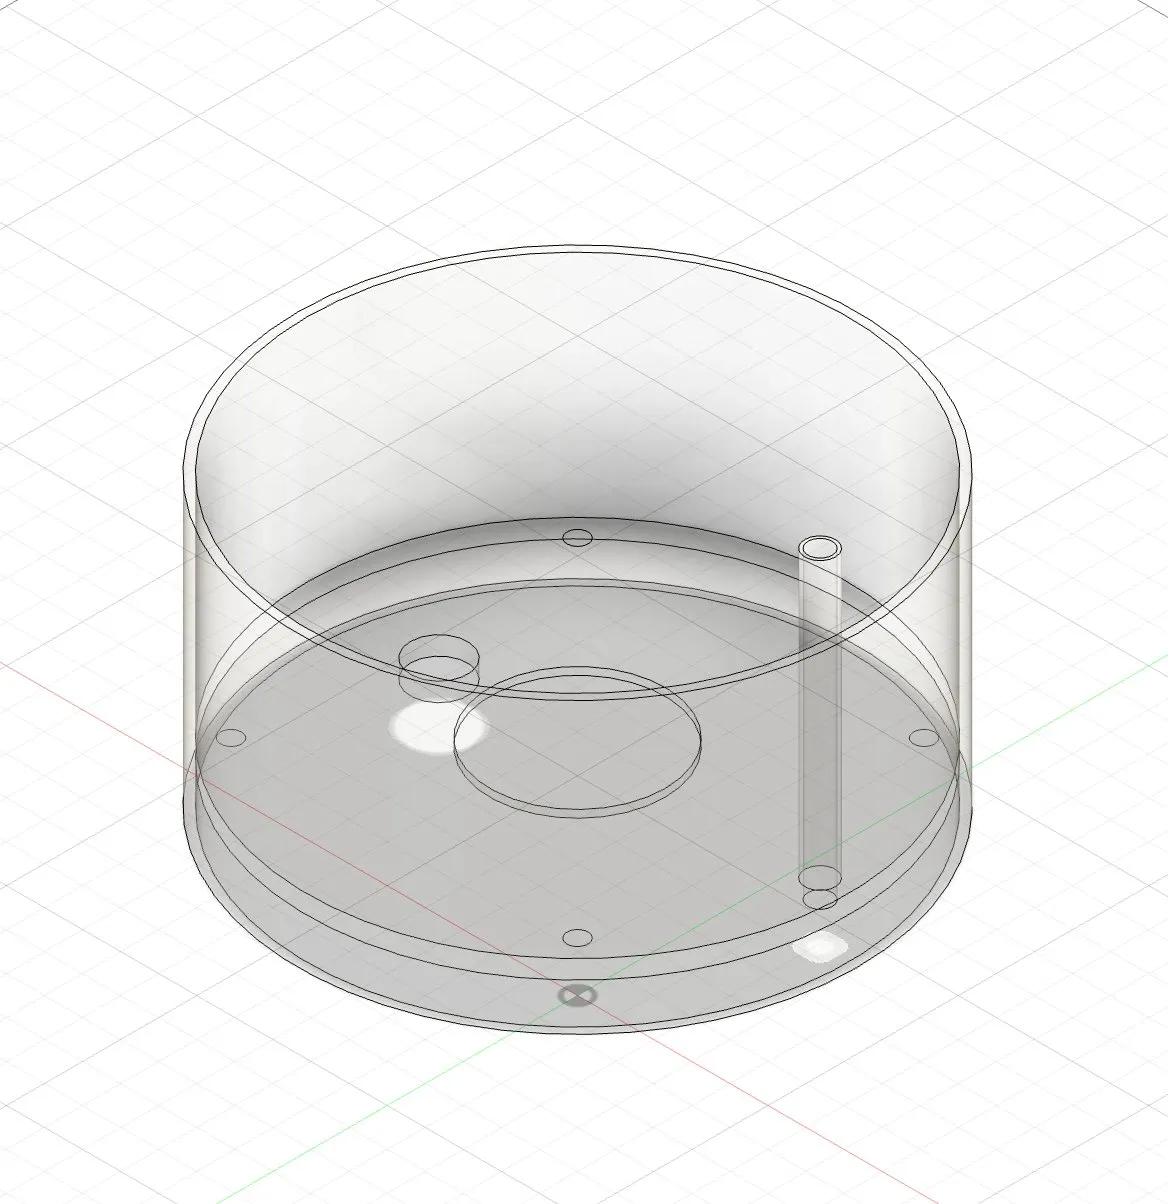 | 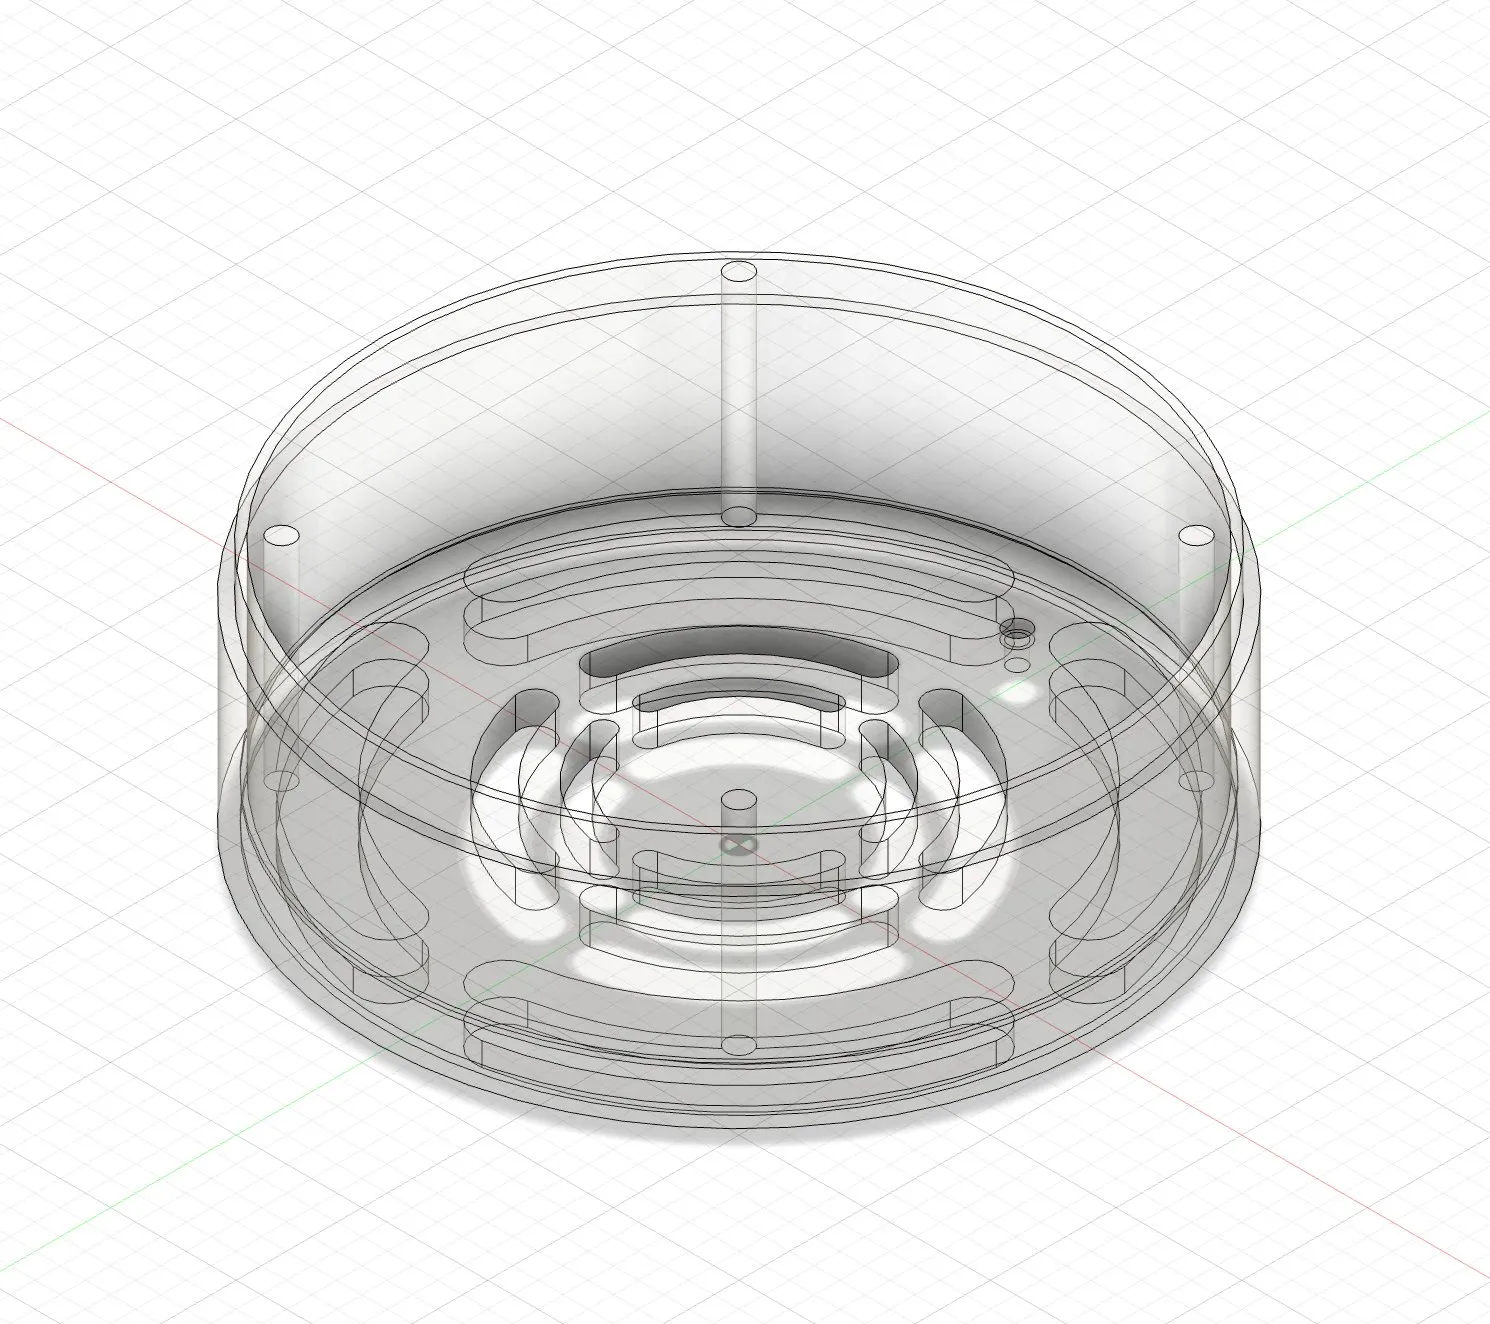 |
The 3D prints seemed to have gone pretty well.
The water basin was water tight with the ultrasonic vibration motor fitting perfectly into the bottom, and the two pieces fit together very well. Watertight straight off the printer is NOT a given, so we took that win and ran!
We just had to figure out whether they diffused light and how to house the electronics.
Then we tried out lights and figured out placement.
It was really starting to look like an aromatic diffuser.
| Water tight | Lights |
|---|---|
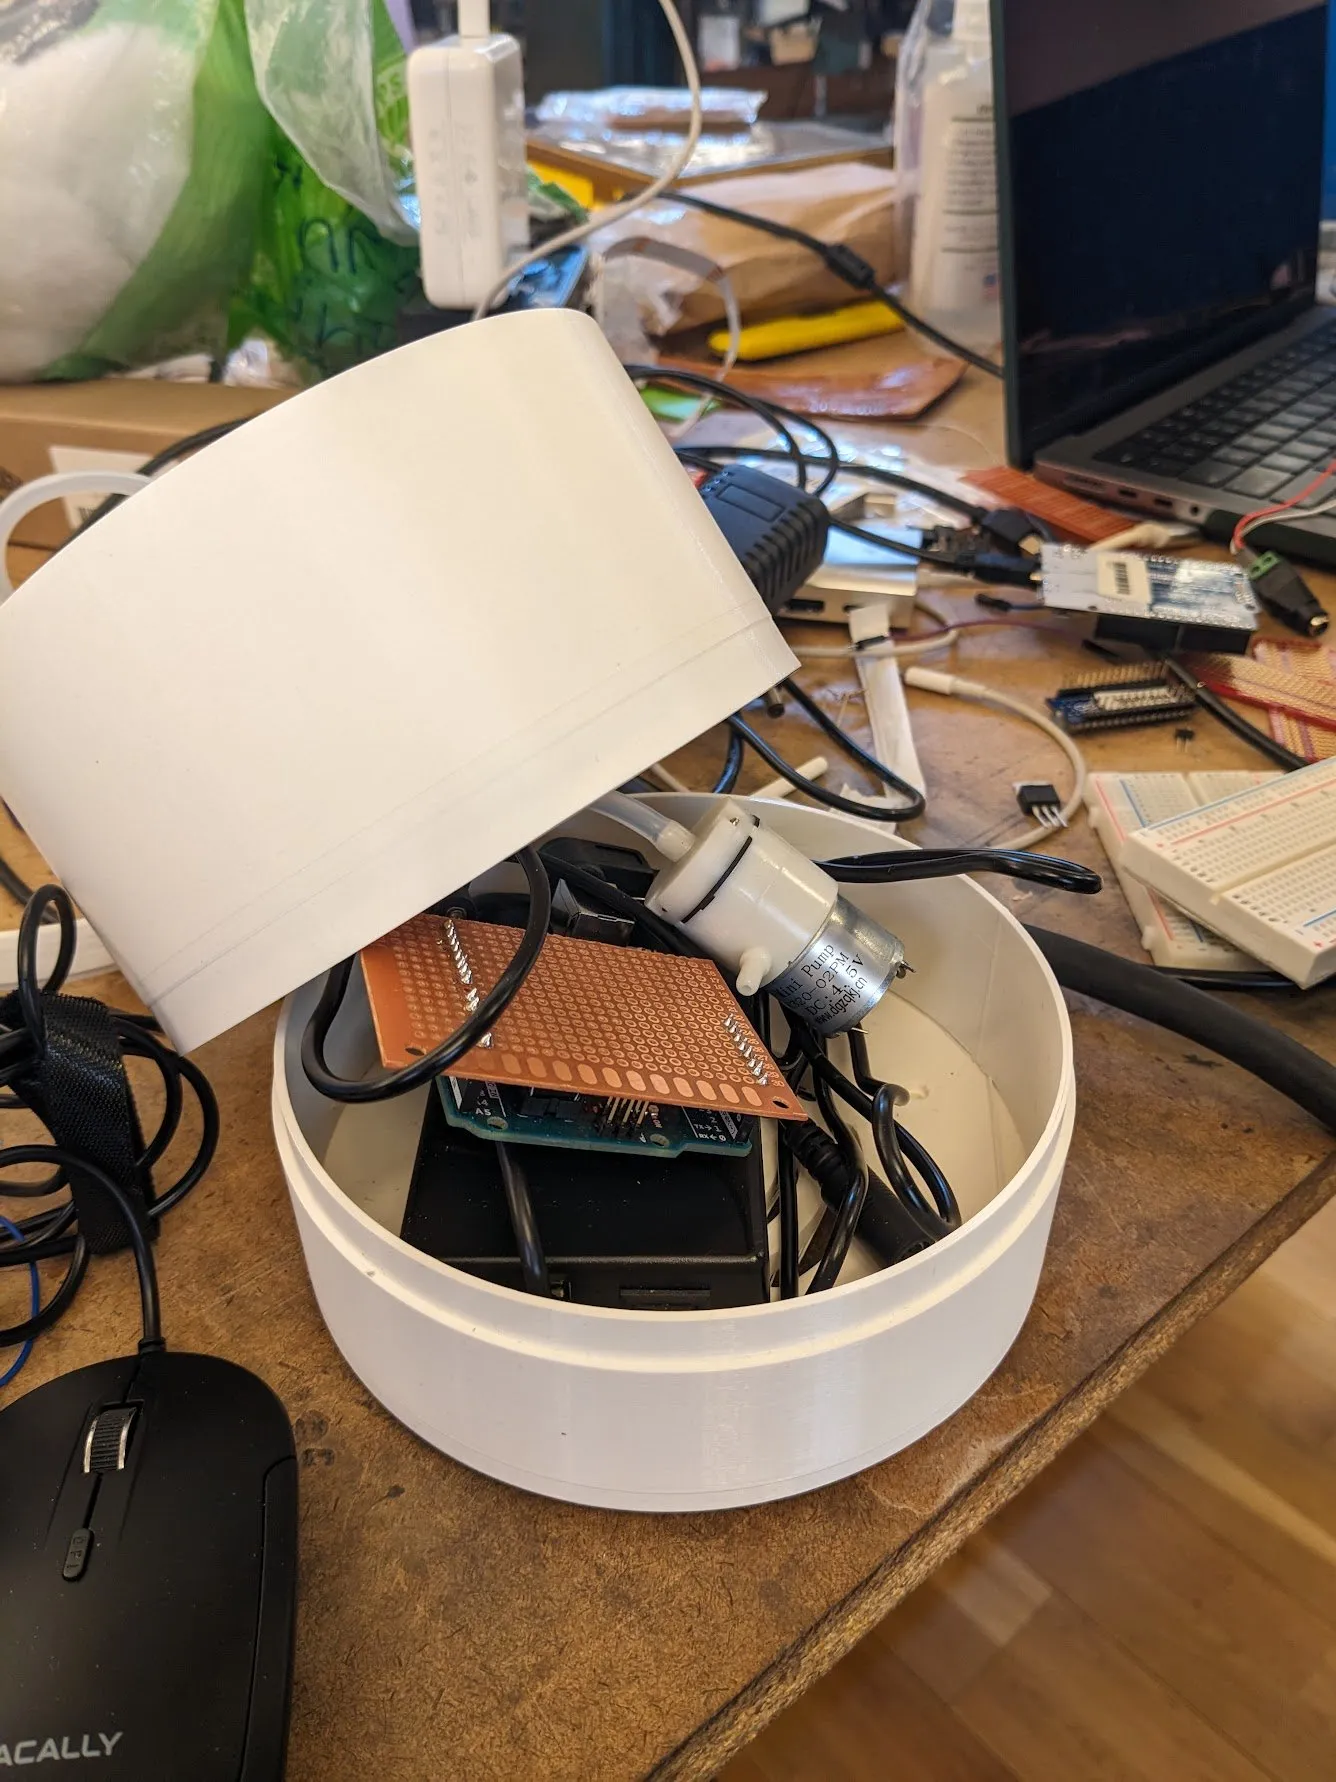
We were going to make it look nicer soon enough, but at least all the electronics fit in their enclosure.
Finishing touches
The bucket saga
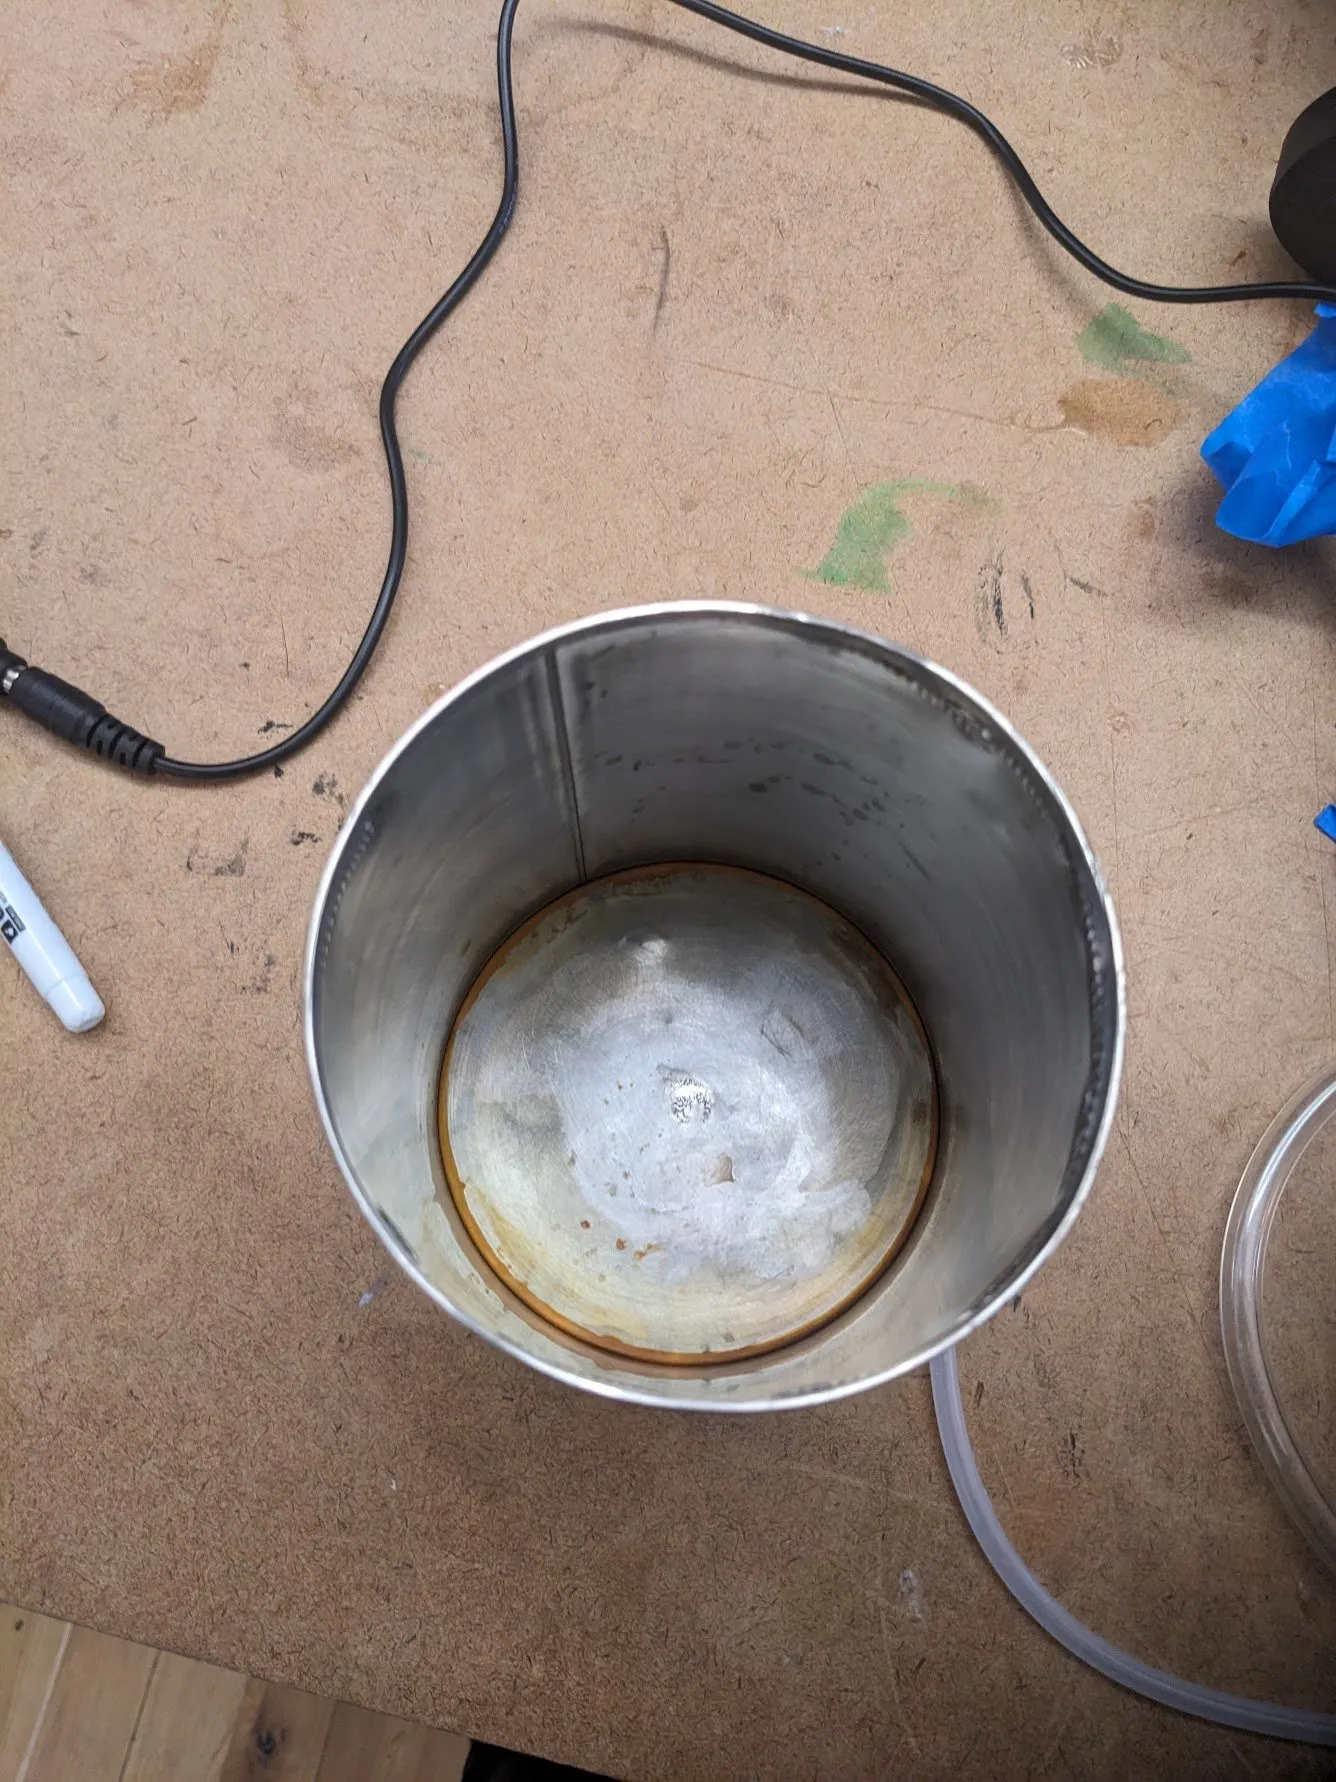
After brushing our aluminum, we (stupidly) didn't treat it to protect it against rust so it rusted pretty badly within just a day.
Okay, in our defense, we'd been calling it "the aluminum" this whole time. But aluminum doesn't actually rust! It grows a thin oxide layer almost immediately and then just stops, which is why aluminum window frames survive decades outside. What we actually had was a steel paint can, and brushing it stripped off whatever coating was protecting it. One day later: orange. That's iron oxide. That's rust.
Got a pail as a replacement, and I'm pretty happy with it. The slight size increase now fits an entire Coke bottle instead of just a mini can!
 | 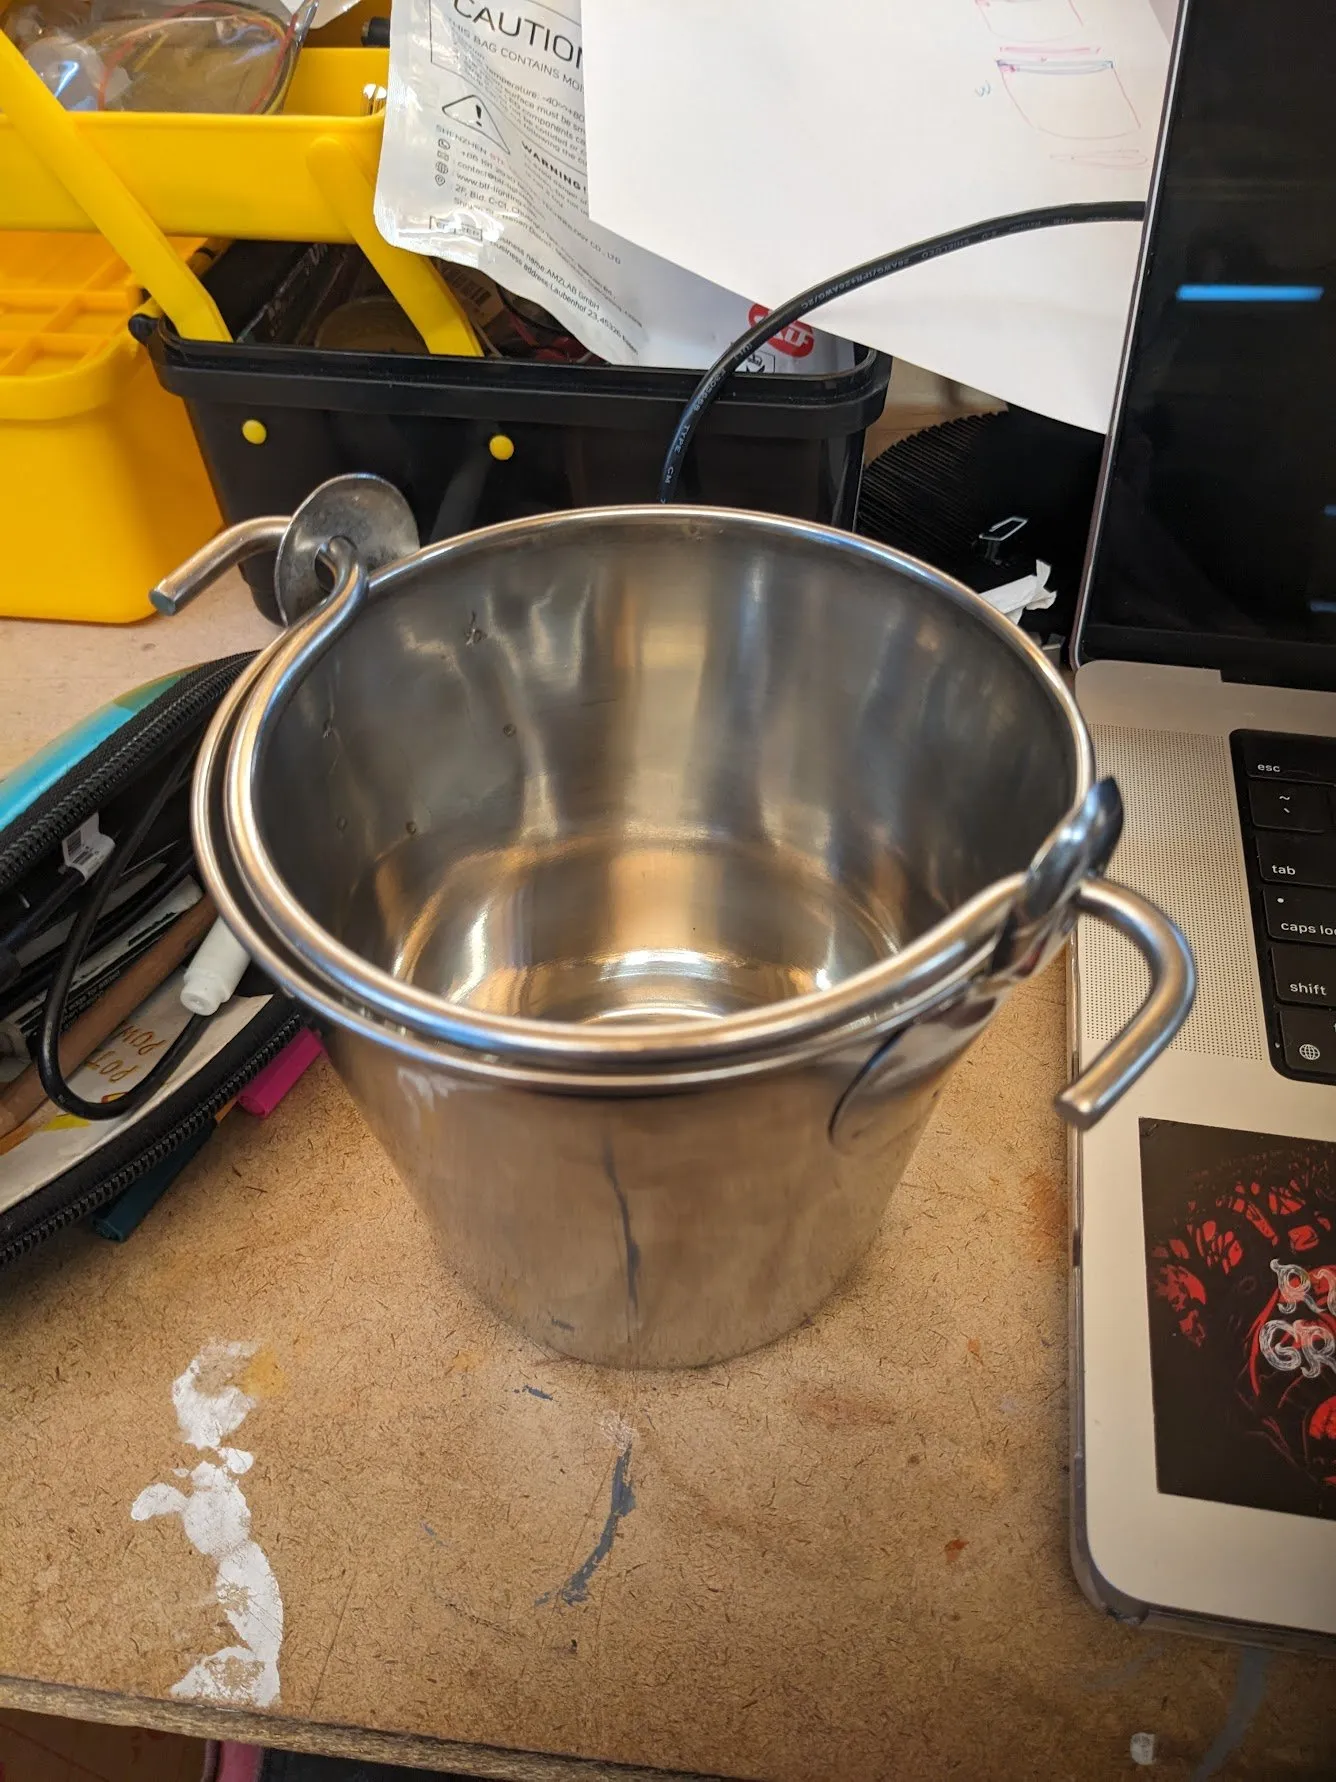 |
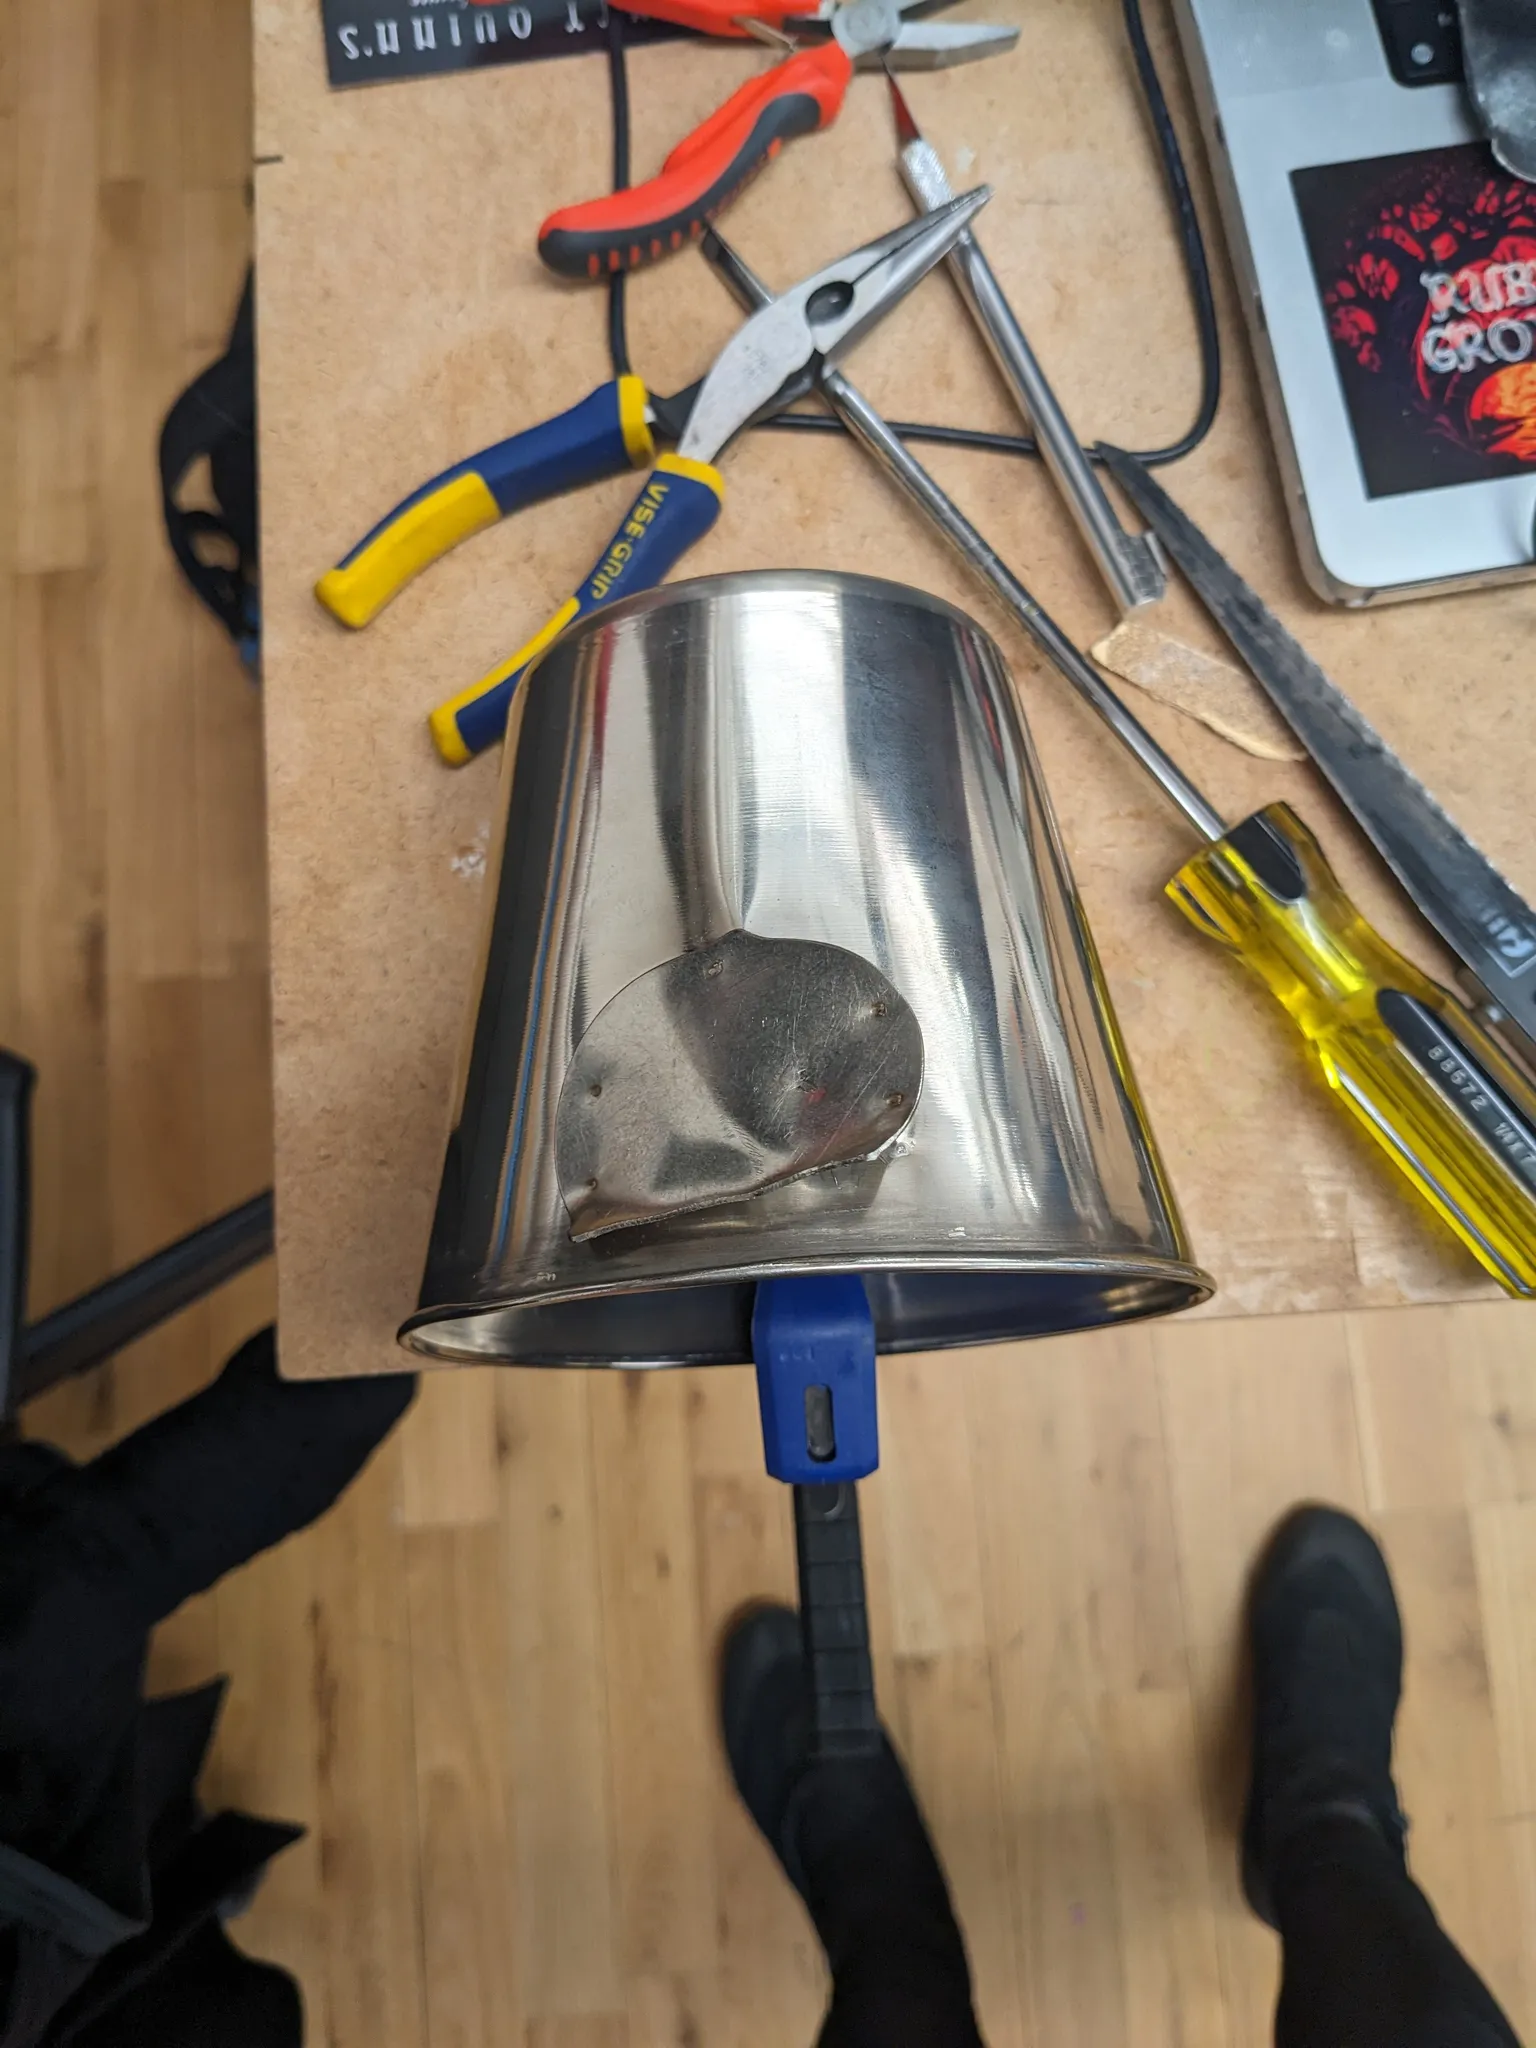
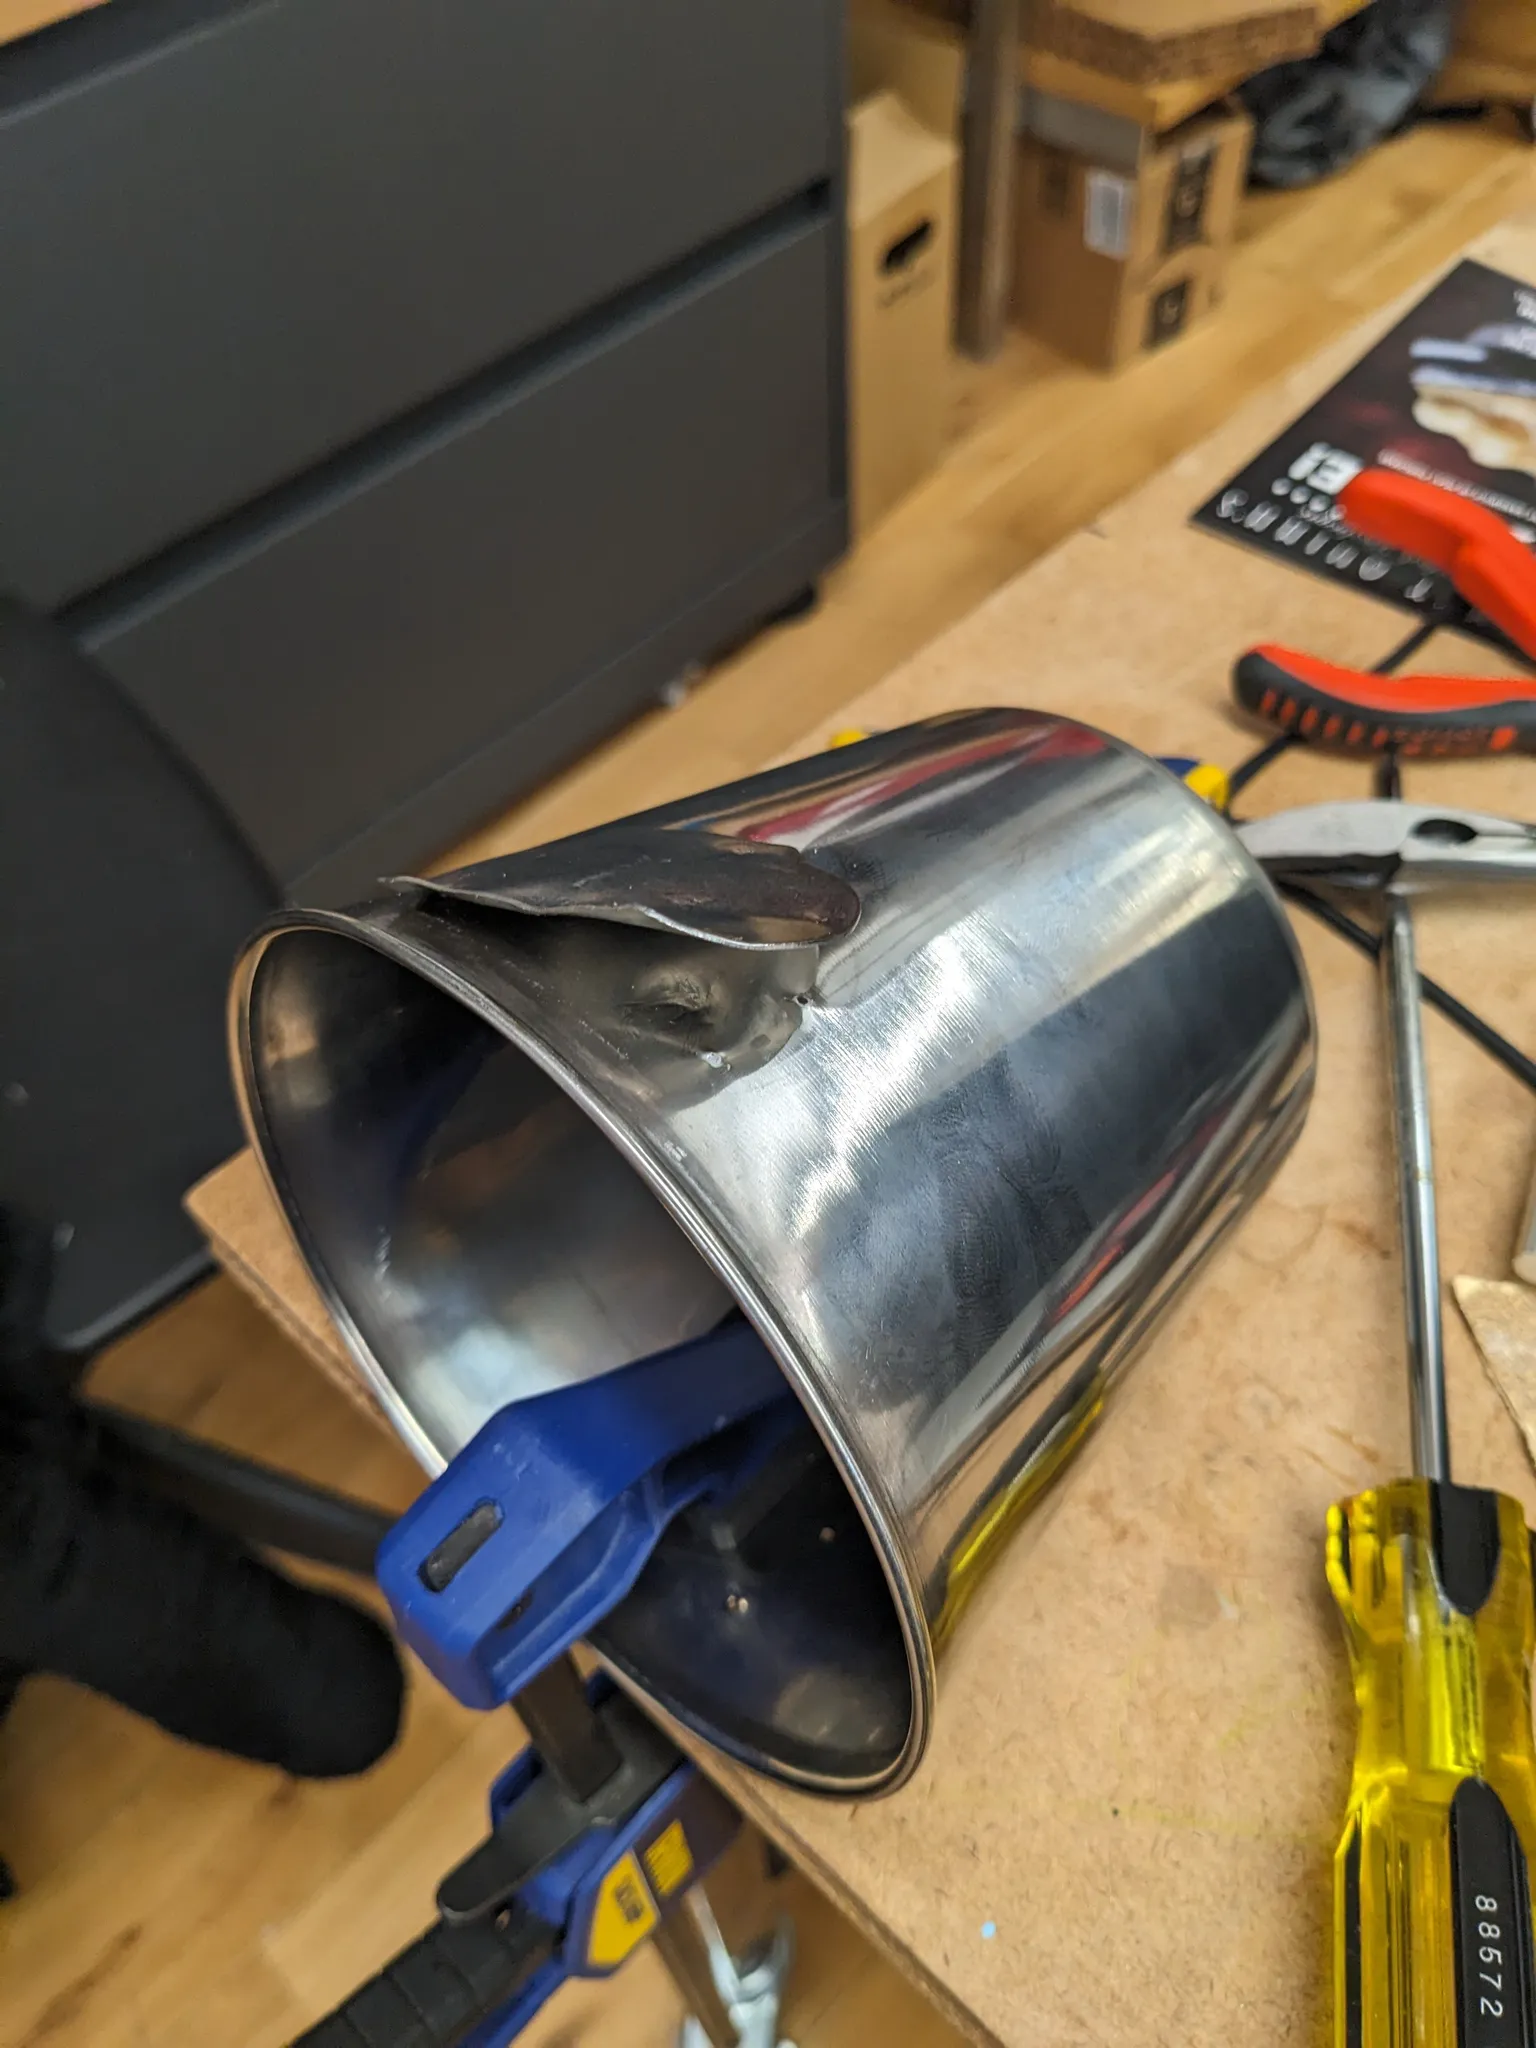
Spent hours cutting off the handle and prying off the welded on decorations. Tried filing, dremeling, pulling with pliers... Eventually a mix of using a screw driver as a lever and pliers I started to see progress!
That moment of victory.
The bucket has finally been stripped of its unnecessary decorations!
 |  |
Sick beats
You know the advantage of cutting a 6" (152mm) diameter acrylic tube with a hand saw is?
Getting to make some sick beats for everyone around you to enjoy when you inevitably have to sand the edges down.
The leather handle
We wanted our lid to have a leather handle, so we tried some things.
First, stitched it. I was surprised our sewing machine could handle that, but alas it could!
But more crazily, yo did y'all know you can wood glue leather to wood? AND it's pretty strong if you do? WtF!?
It makes more sense than it sounds! Wood glue is a PVA, and PVA grabs onto porous fibers. The flesh side of veg-tanned leather is basically a mat of loose collagen fiber, so there's plenty for the glue to sink into. Wood is porous, leather is porous, and the glue soaks into both and cures into one piece.
Matching the palette
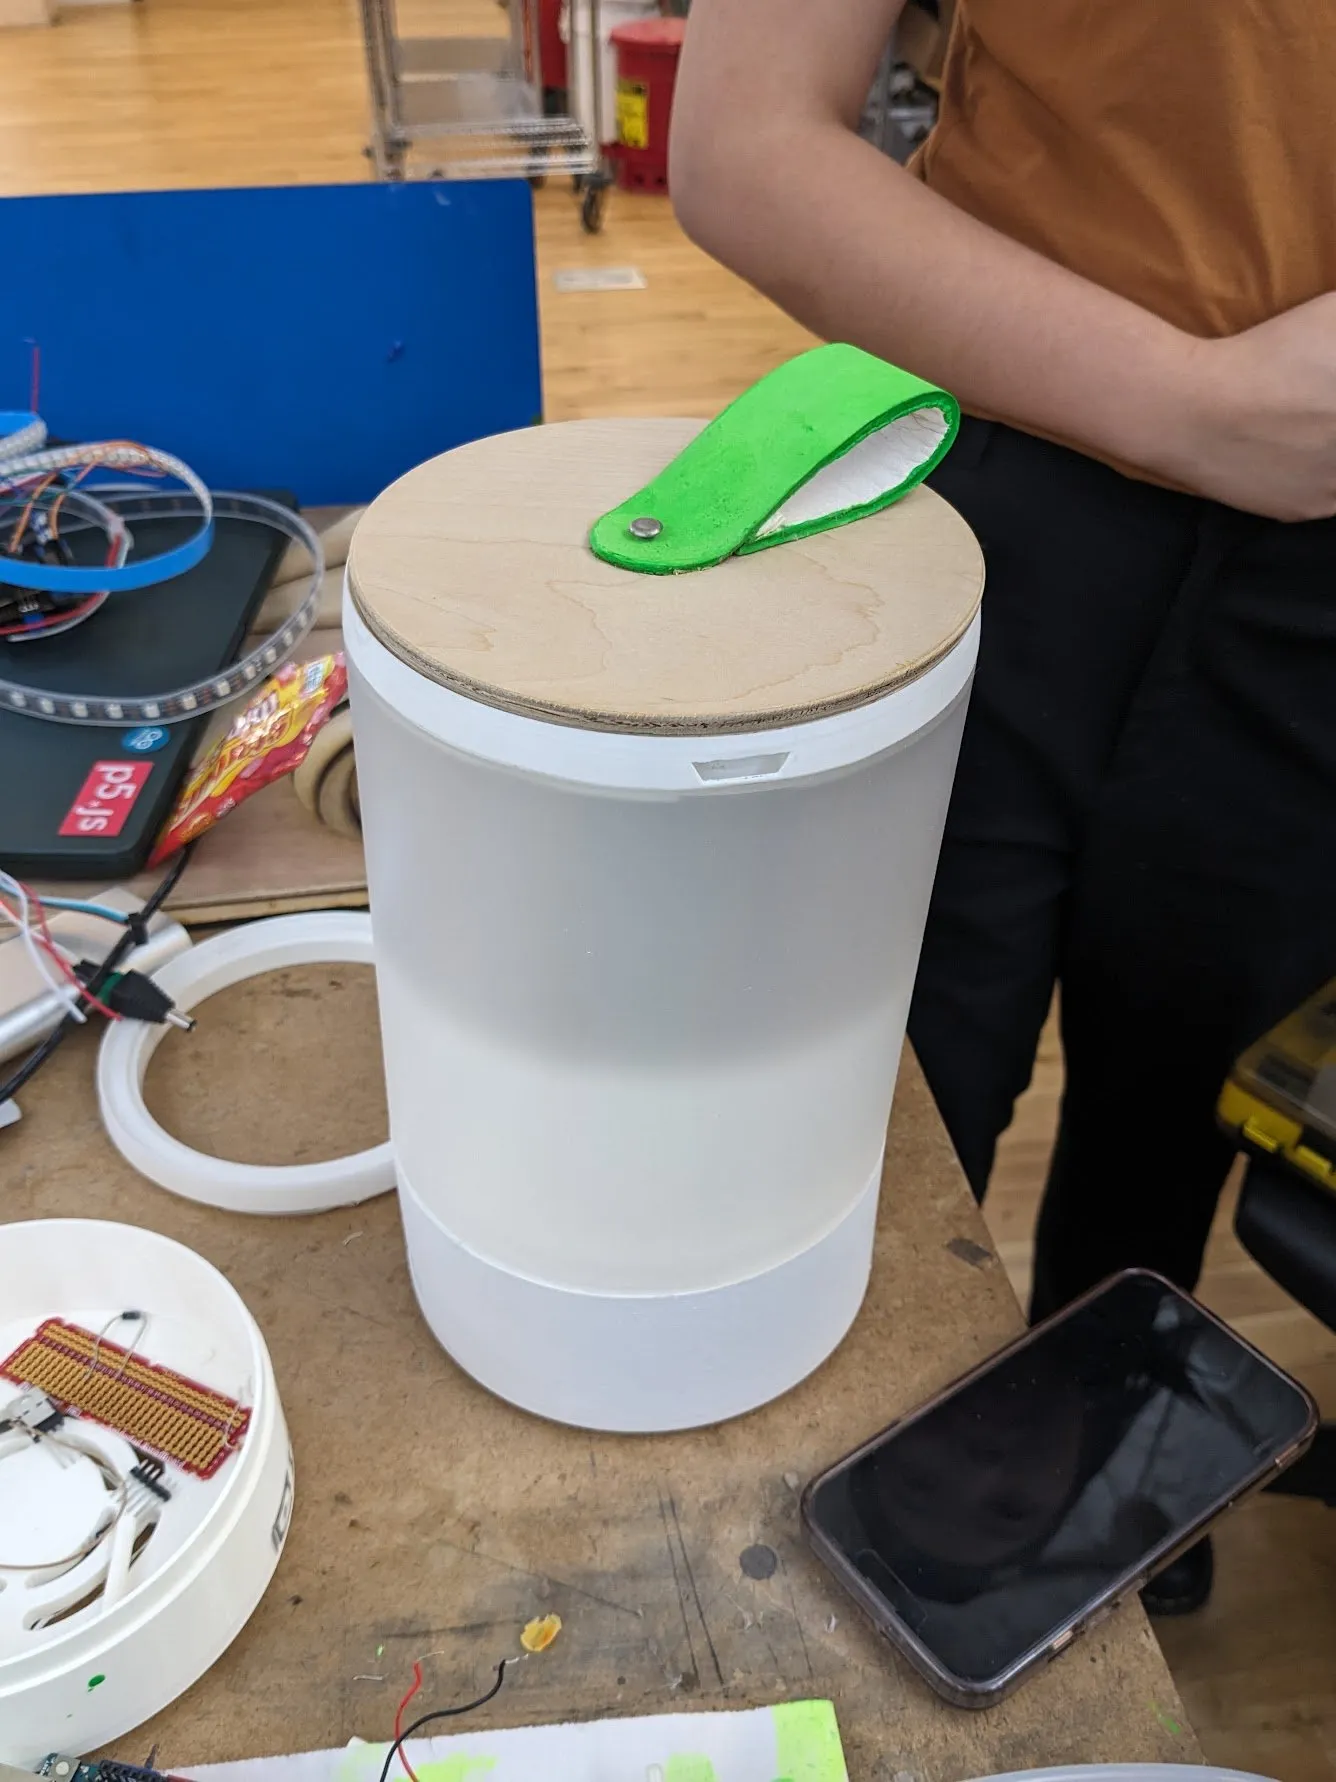
Hey...It was looking pretty good!
We had to very carefully match a color palette for this assignment; the green is a bit too dark and the wood a bit too light, but other than that I think we're pretty spot on!
Even though the final was over, my partner and I had ideas for improvements and our professor had some good ideas.
Sometime in the next month we'll implement those and get a formal documentation appointment. E.g. Better light diffusion ideas.
That was the plan, written the night the final ended! And you can still see the light diffusion problem right there in that last video: one hot red stripe across the middle where a soft even glow is supposed to be. One LED strip behind a translucent wall gives you a stripe, not a light. It needs either more distance between the LEDs and the wall, or a diffuser inside the diffuser. For a chindōgu, that feels about right.
 |  |